Browsed by
Category: other things I make

wall words

wall words

Have you seen some of the amazing things that people have been doing with vinyl stickers on their walls? I’ve been loving them and have so many ideas of ways that I could use them too. But, if you’ve been reading a while, you know that I am really really cheap  frugal, and would much rather make a knock off than pay for something.

I have been wanting to put a word or phrase in the little empty space in the middle of this picture grouping for a while and finally did it the other day.

I gathered:

  • a pencil,
  • soft erasure,
  • watercolor paints (the really cheap dollar store kind that come with a plastic brush),
  • cup of water and white saucer,
  • and a moist rag,

all of which I already hand on hand – so this project cost absolutely nothing!

My first step, after determining what I wanted to write (and making sure that Emma was napping so she wouldn’t see me writing on the wall), was to pencil in the lettering.
I’m not quite confident enough to just take a paint brush to the wall, even though I would have been able to wipe it clean and start fresh if if didn’t turn out just right so the pencil allowed me to adjust the spacing and height of the letters a bit, and stand back and look before I comitted to using the paint. At this point you can erase the letters completely if you decide that it’s not the look that you’re going for.

The second step was to mix the paint. I used a sepia toned brown that I made by mixing a bit of black and brown in the white saucer. Once I was happy with the color I moved on to the third step which was start painting!
My hand shook a little at the beginning, but I used the damp cloth to ease out any squiggles and just kept moving.
I kept adjusting and adding paint here and there to darken it as I went, and then after a bit stood back to look. It turned out great!

I really love the way it looks, and especially love that it was free! Also, A Little Nick Nack is hostessing a giveaway of some of my things – you might like head on over and enter :)

I’m linking this over on some of these fun blogs – head over and check out what others are posting!

A little bit random

A little bit random

Did you know that Blogger has a statistics feature that allows you to, well, see your blogs statistics? It’s pretty cool. There are some days where there have been a few hundred people stopping by. Pretty cool.

And, did you know that when I don’t post anything here for a few days, I get a lot less people stopping by? Who’d have thought. I mean really, who wouldn’t want to read the same posts over and over? ;)

So, for those of you who like to read new things, here’s a new, albeit slightly random, post.

Lately I’ve been working hard on finishing up some of the projects that I’ve been meaning to get to, getting Etsy orders out (thank you again to the lovely people who have been placing those orders!) and keeping the apartment warm with baking (our apartment manager is finally getting the heat going this week).

The projects that I’ve finished include Ian’s hat and matching sweater (I’m planning an an entire post about the set),

a lined pair of pants for him,

a coordinating skirt and pair of pants for the two of them,

and a set of matching lined jammie pants for Em and Ian to wear this winter.

And John went hunting.

So, progress is being made! It’s so good to see the fabric pile in our bedroom shrinking a little (and I know John appreciates that a LOT).

I’m linking this to a few of these bloggy get-togethers. There are some amazing Thanksgiving and Christmas ideas and tutorials being posted!

And be sure to enter the CSN Stores giftcard giveaway. :)

I did it!

I did it!

You know the “Ideas” page on the blog? And how it’s getting rather, well, long?

Well, I finally made something from it!
I found the Heirloom Cut Chenille Baby Blanket on Aesthetic Nest a while ago and immediately knew that I needed to make one – or maybe more? – for my little ones.

It took me what seemed like forever (Ian has learned to sense when I’m sitting down at the machine and then decides that he needs to eat right NOW and that the blanket can wait!), but it’s finally done!

 I used cotton seam binding instead of the satin blanket edging that she recommended since I wanted the whole thing to be 100% cotton, and I really, really love it. The “flat” side of the blanket is a light moss green with cream dots, and the chenille side is made of light green, yellow and cream. I’ve washed it a few times since it’s been finished (it is getting used!) and it gets a little softer each time.

Can I say again that I just love this blanket?

I’m linking to a few of these great craft blogs – head over and check out the creative ideas!

an idea + bits of fabric + thread = something pretty

an idea + bits of fabric + thread = something pretty

Well, hello there! It’s been a few days since I’ve posted anything …… but I have a good reason (I mean, other than being a mommy to two little ones, that is)! We took a week of vacation to visit family, and now are back. It was a good time of reconnecting with everyone,and my family especially enjoyed meeting Ian. His Grampa and aunts and uncles were completely smitten. :)

Things are settling into their routine again, the laundry is all washed and put away, and I am getting a few new things ready for the shop. One of the new items is something that I probably would never have made if it wasn’t for someone else’s idea.
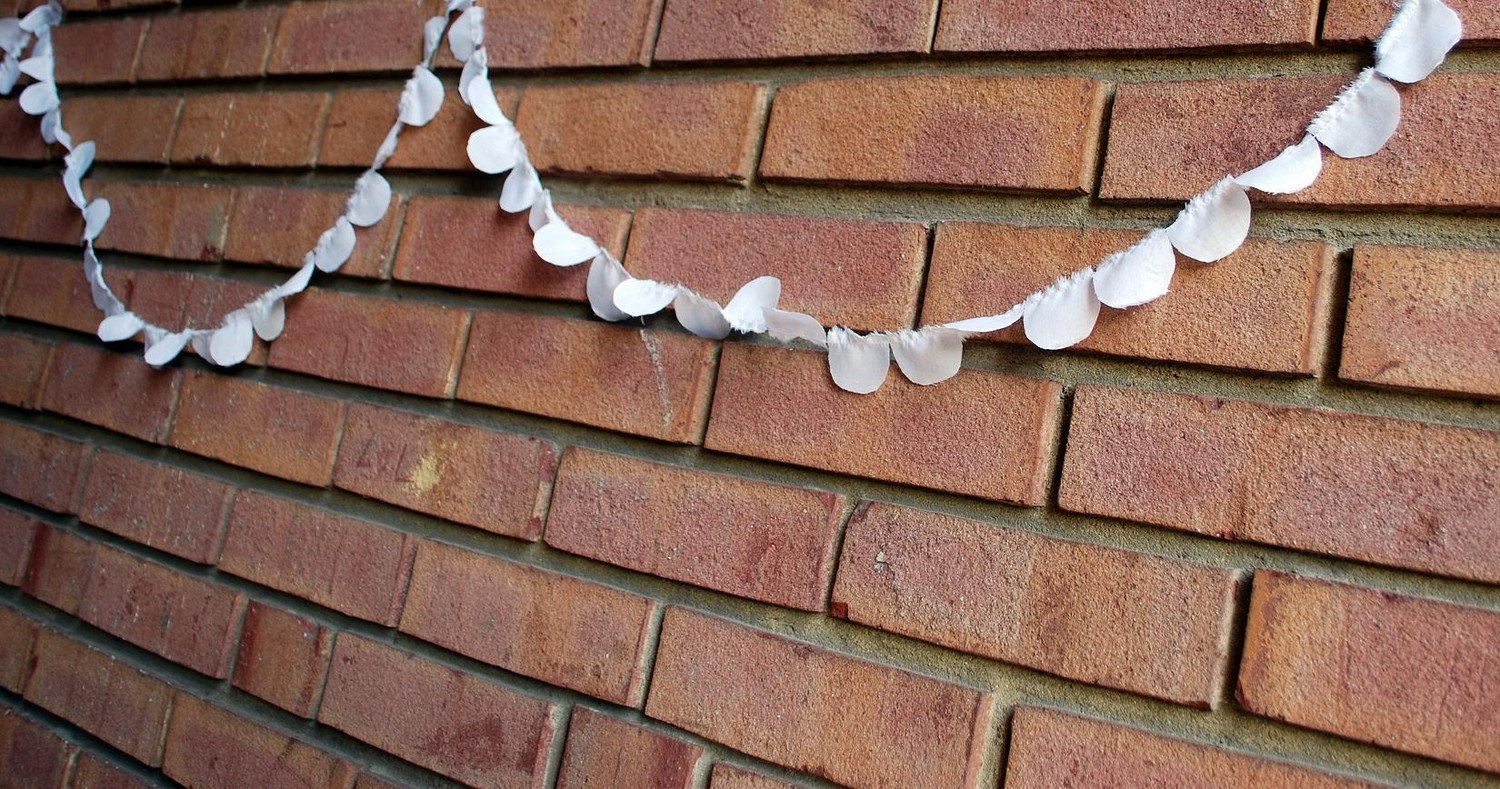
A few days ago a woman over in England sent me a custom request for a garland that was similar to others that I have listed, but different – made out of fabric and white.

After a few emails back and forth, this is what we came up with:

I am so glad she contacted me – otherwise I might never have ventured into making something like this! It’s really gorgeous, fluttery and delicate. It reminds me of snowflakes, dandelions, and almond blossoms. And mini marshmallows. :)
It would be sooooo pretty adorning a wedding. Or a nursery. A party. A Christmas tree. A mantle piece or doorway. Above a headboard. Pretty much anywhere!

There are more in the works for the shop, and I might just squeeze time in to photograph and post a tutorial. Maybe. :)

Once again, I’m posting a link to this on a few of these craft blogs – head on over and check out the amazing ideas other people are posting!

KCWC update

KCWC update

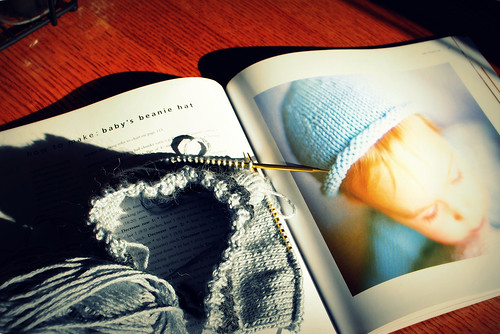
Ian’s hat, originally uploaded by Lizi Beth.

I’ve been working away, although a little at time, on my daily hour+ commitment for the KCWC. It’s been so nice to have an excuse to sit down and make little clothes for my babies!

On Monday I made Emma a nightie using a nightshirt that I cut down and altered (pics coming in a later post). It turned out so sweet.

Tuesday, Wednesday and today I’ve been knitting up a little hat for Ian to wear this winter. His head is already a toddler size (big boy!), so the hats I was hoping he could wear are a bit snug on him. :)
The pattern I’m using is from Simple Knits for Cherished Babies and I’m knitting it up with Caron Country Merino Blend in “Silver Service” on size 6 needles (hoping that it’ll fit longer).

I’m linking this to some of these blogs :)

off the needles

off the needles

The baby cardigan that I was working on for Ian is finished and ready to wear. It turned out sooooo darling.

I made it in the 3-6 month size, but it already fits him! Of course, Ian is a big boy (he was 9lbs 7 oz at birth and now is around 14 lbs). I also didn’t take the time to knit up a swatch before I started, so it may have turned out a bit smaller than the one in Essential Baby. But I love it anyway. If it doesn’t get cool enough for Ian to wear before he grows out of it I may give it away.

Or then again, I may just hold onto it. :)
The yarn is some soft cotton stuff that I saved when I unraveled one of my old ones (and has been used for so many baby things already).

linking to these parties.


bench cushions

bench cushions

The sewing machine has been put away for the past month and a half. It wasn’t really broken, but there was a rather crucial part missing (Emma was trying to be “helpful” and it got thrown away).
Unfortunately, you just can’t go to the fabric store and ask which aisle the shuttles for Brother sewing machines are on! My Grammy-in-law very kindly gave me the name and number of a dealer that she uses, and now we are back in the swing of things. :) And a good thing, too, since my “ideas file” is starting to get pretty long!


The first thing at the top of the pile was covers for the bench cushions.
John made this bench and proposed to me on it, and right now (since we are living in a ~900 sq foot apartment) it is serving duty as our couch. I had bought the cushion inserts from Ikea with some birthday money, had measured and cut out the material that had been used in practically every room for some purpose or another, and pulled out the machine only to find it inoperable. :) Ah well, we’re finishing now!

I cut three pieces for each pillow:
1 26″ x 26″
1 26″ x 22″
1 26″ x 8″

Next, I sewed a 1″ seam down one of the 26″ sides of both of the smaller pieces (this would create a finished pocket-style opening).

Then I stacked the large piece with the middle-size on top, right sides together and raw edges matching on three sides …

… with the smallest piece on top, overlapping the finished edge of the mid-sized piece. I pinned them all together and sewed around the edge using a 1/2″ seam.
Since I wanted a really rumply and relaxed look, I didn’t bother to clip the corners or press the seams.

For the last step I put a button and button hole in the middle of the edge of the pocket opening (I was using a rather slippery type of upholstery fabric. If you use some a little stiffer or less slippery, you might be able to skip this) to keep the edges from gaping.

a blanket for our little one

a blanket for our little one

I made a blanket for Ian using the Scallop Blanket “pattern” (it’s actually more like illustrated instructions than a traditional pattern) from Bend The Rules Sewing. If you haven’t seen Bend The Rules yet, I highly recommend thumbing through a copy. My mother-in-law gave me the book for last Christmas and I am loving it!

Even though I didn’t get an ultrasound during my pregnancy with Ian I was fairly sure that we were having a boy. So for his blanket I pulled out the yard of this airplane fabric that I had bought at Hancock when I was pregnant with Emma.
I already knew we were having a girl when I got it, but it was so sweet and classic, and, well, that ultrasound might have been wrong! Now it seems as if Hancock has discontinued the print, so I’m glad I went ahead and bought it instead of waiting until we had a boy.
The blanket has cotton flannel on the back to make it a bit more snugly. :)


Since I used a light color for the backing and the stitching was clearly visible (and since Ian was taking his time coming – he was a week overdue) I took the time to quilt four airplanes in the center squares. They are “flying” around the center in a circle and add a nice bit of detail.