Browsed by
Category: other things I make

grandma’s muffins

grandma’s muffins

Grandma's Bran Muffins | The Path Less Traveled Oh, the smells and flavors of family recipes! This month my grandma would have been 91 years old, and I’ve been thinking of her {and her recipes} a lot. These muffins came to mind, and I dug around a bit in my box of her recipes {sometimes I can hardly believe I have it! Such a treasure.} and found it – the recipe for grandma’s muffins.Grandma's Bran Muffins | The Path Less Traveled Grandma's Bran Muffins | The Path Less TraveledGrandma was an RN, and she was a firm believer in keeping everything “moving” ….and these muffins are some that I remember being a staple. {these, and her getting after grandpa for drinking too much coffee or using too much salt – “Jerr-ry!” :D}
Grandma's Bran Muffins | The Path Less Traveled They are just a simple bran muffin, and best served warm with a thick swipe of butter.Grandma's Bran Muffins | The Path Less TraveledGrandma would top each one with a half of a pecan – a lovely touch. I remember Grandma loving the lovely touches, especially in the food she made.
Grandma's Bran Muffins | The Path Less Traveled Grandma's Bran Muffins | The Path Less Traveled Grandma's Bran Muffins | The Path Less Traveled When I found the recipe, I was a bit surprised to see that it was one that she had gotten from a friend – but only a little. :) Sometimes the best recipes are from friends, aren’t they? Also, I’m not sure why they are called “6-week Bran Muffins”. Grandma's Bran Muffins | The Path Less Traveled Grandma's Bran Muffins | The Path Less Traveled Grandma's Bran Muffins | The Path Less Traveled Grandma's Bran Muffins | The Path Less Traveled

These are quite simple to whip up, and freeze well.

6-week Bran Muffins

  • 3 cups bran cereal {grandma used All Bran}
  • 1 cup boiling water
  • 1/2 cup shortening {I used oil, grandma noted that she used margarine}

Mix above and let cool.

  • 2 eggs
  • 1/2 quart buttermilk
  • 2 1/2 cups flour {I used whole wheat}
  • 2 1/2 tsp baking soda
  • 1 tsp salt
  • pecan halves for topping, optional

Mix everything together, and bake the muffins at 350 degrees for 25 minutes. Makes 30 muffins.

Remember, they are best warm! With butter! But don’t eat too many at once ;D


Autumn Leaves Light Catcher

Autumn Leaves Light Catcher

I love Autumn (and Winter. And Spring. And Summer – okay, I love them all …). I love the crispness, the colors, the baking, the lack of mosquitoes, and the way the light changes. It is not quite Winter blueness, but not quite Summer intensity – kind of warm, makes you feel cozy, like you are being wrapped in a blanket.

DSC_0071Our trees are changing colors so quickly, and then shedding their leaves promptly – changing and moving toward Winter. I was looking out our back window the other evening, watching the light stream through our maple tree. The color was just so glorious. Knowing that the leaves would be gone in just another day or two, I wanted to capture a little bit of that gloriousness for a while longer, to enjoy the light in the leaves for a few weeks more. So – an Autumn Leaves Light Catcher!DIY Autumn Leaves Light Catcher materials needed:

  • an assortment of lovely fall leaves (collecting these would be a perfect opportunity for a Nature Walk)
  • a branch – this can be straight or curvy, your choice!
  • string (you could also use fishing line/monofilament to achieve a “floating leaves” look)
  • scissors

DIY Autumn Leaves Light Catcher

step 1:

tie the string to the stem of a lovely little leaf.DIY Autumn Leaves Light Catcher

step two: cut the string to the desired length and tie it to your branch.DIY Autumn Leaves Light Catcher

and continue these until you like the way it looks! I like the way staggering the heights of the leaves looked, but there really isn’t any “Wrong” way to do this. Just enjoy the process. :DAutumn Leaves Light Catcher Project

Once you have the leaves suspended the way you like, add one more string to hang the mobile with and find a place where the light will stream through. After that, just remember to take a moment or two every day to enjoy the beauty, let the warmth of color and light feed your spirit.

This could be altered in all sorts of ways – add feathers! Use paint pens to decorate the leaves! Or glitter! Really, the only limit is your imagination. :)

If you’re looking for other Autumn Inspiration, I have some lovely Autumn and Thanksgiving things on Pinterest.


<3

crafting for a baby

crafting for a baby

Crafting for a sweet new baby is always a joy! A few weeks ago I had the privilege of making this entirely custom, delicate name banner for my precious new niece, and I had so much fun. Her mama is decorating the baby Cora’s new space in blush and glittery gold, so I even got to use some of my current favorite papers. :)a personalized name banner for a baby - perfect for both a baby shower and a birthday party! | the Path Less Traveled

Her mama is decorating the nursery for this babe in gold and pink, so I had a ton of fun making a sweet, girly and glittery name banner for baby Cora using some of my favorite papers and ribbons. I went with scalloped circles in a vintage rose print for the background and gold glitter for the letters, all strung on a light rose satin ribbon. So feminine, and suitable for both a baby and a growing girl.

I am experimenting in making our the name banners in our shop in this double-layered look, and enjoyed doing the same for little Miss Cora, giving her special garland an extra bit of style and texture. The glitter gold played so beautifully off of the vintage rose print!
crafting a glitter and rose name banner for a baby | the Path Less Traveled

These multilayered banners are something I love making, and there are so many options!!! We are planning to add a variety of them to the shop in the next little while, and are just having a bit of trouble deciding exactly which options to offer {there are soooooo many!}. If you have something in mind that you’d like to see, we’d love to hear about it. :)

What do you think? Would you like to see more of this rich, layered look in our pieces? I’d love to hear!


<3

end of summer {Mint Chocolate Chip Ice Cream recipe}

end of summer {Mint Chocolate Chip Ice Cream recipe}

Oh my, we’re already looking at the end of Summer! In just one week it will be Labor Day here in the US, the day that traditionally signals the end of Summer and the closing of the community swimming pools {and the end of wearing white!} and the begin of Fall. Some of you with kids have already been back in your school routine for a month {the summers seem to keep getting shorter, don’t they?} and some of you won’t start until after Labor Day – but either way, the weather still says “Summer” and every last bit of it should be enjoyed … and what better way than with home made ice cream, of course!!!

My sister’s favorite flavor is Mint Chocolate Chip, and every few years I’ve tried my hand at making a yummy home made version – with varying results. Most recipes I’ve tried call for mint extract to provide the minty lightness, and I’ve found that usually it gave the ice cream an odd, “fake” flavor – not what I have in mind when I’m making ice cream from scratch! So, the other day I was missing my sister, had Mint Chocolate Chip on the brain again, and decided to give it another try. A few weeks ago I made a coconut ice cream recipe from Annie’s Eats {sooooo yummy! and it’s a simple, quick one, too :)} made from coconut milk that had the coconut flavor strengthen by steeping some flaked coconut in the milk. Yum! And so the idea for this version, spun off of hers and tweaked to include chocolate, was born.

16 oz half and half {or 1 cup heavy cream and 1 cup milk}

1/2 cup sugar

a sprig of fresh mint {mine was a gift from CameronHomemade – so kind of her!}

4 {+} oz chocolate

an ice cream maker

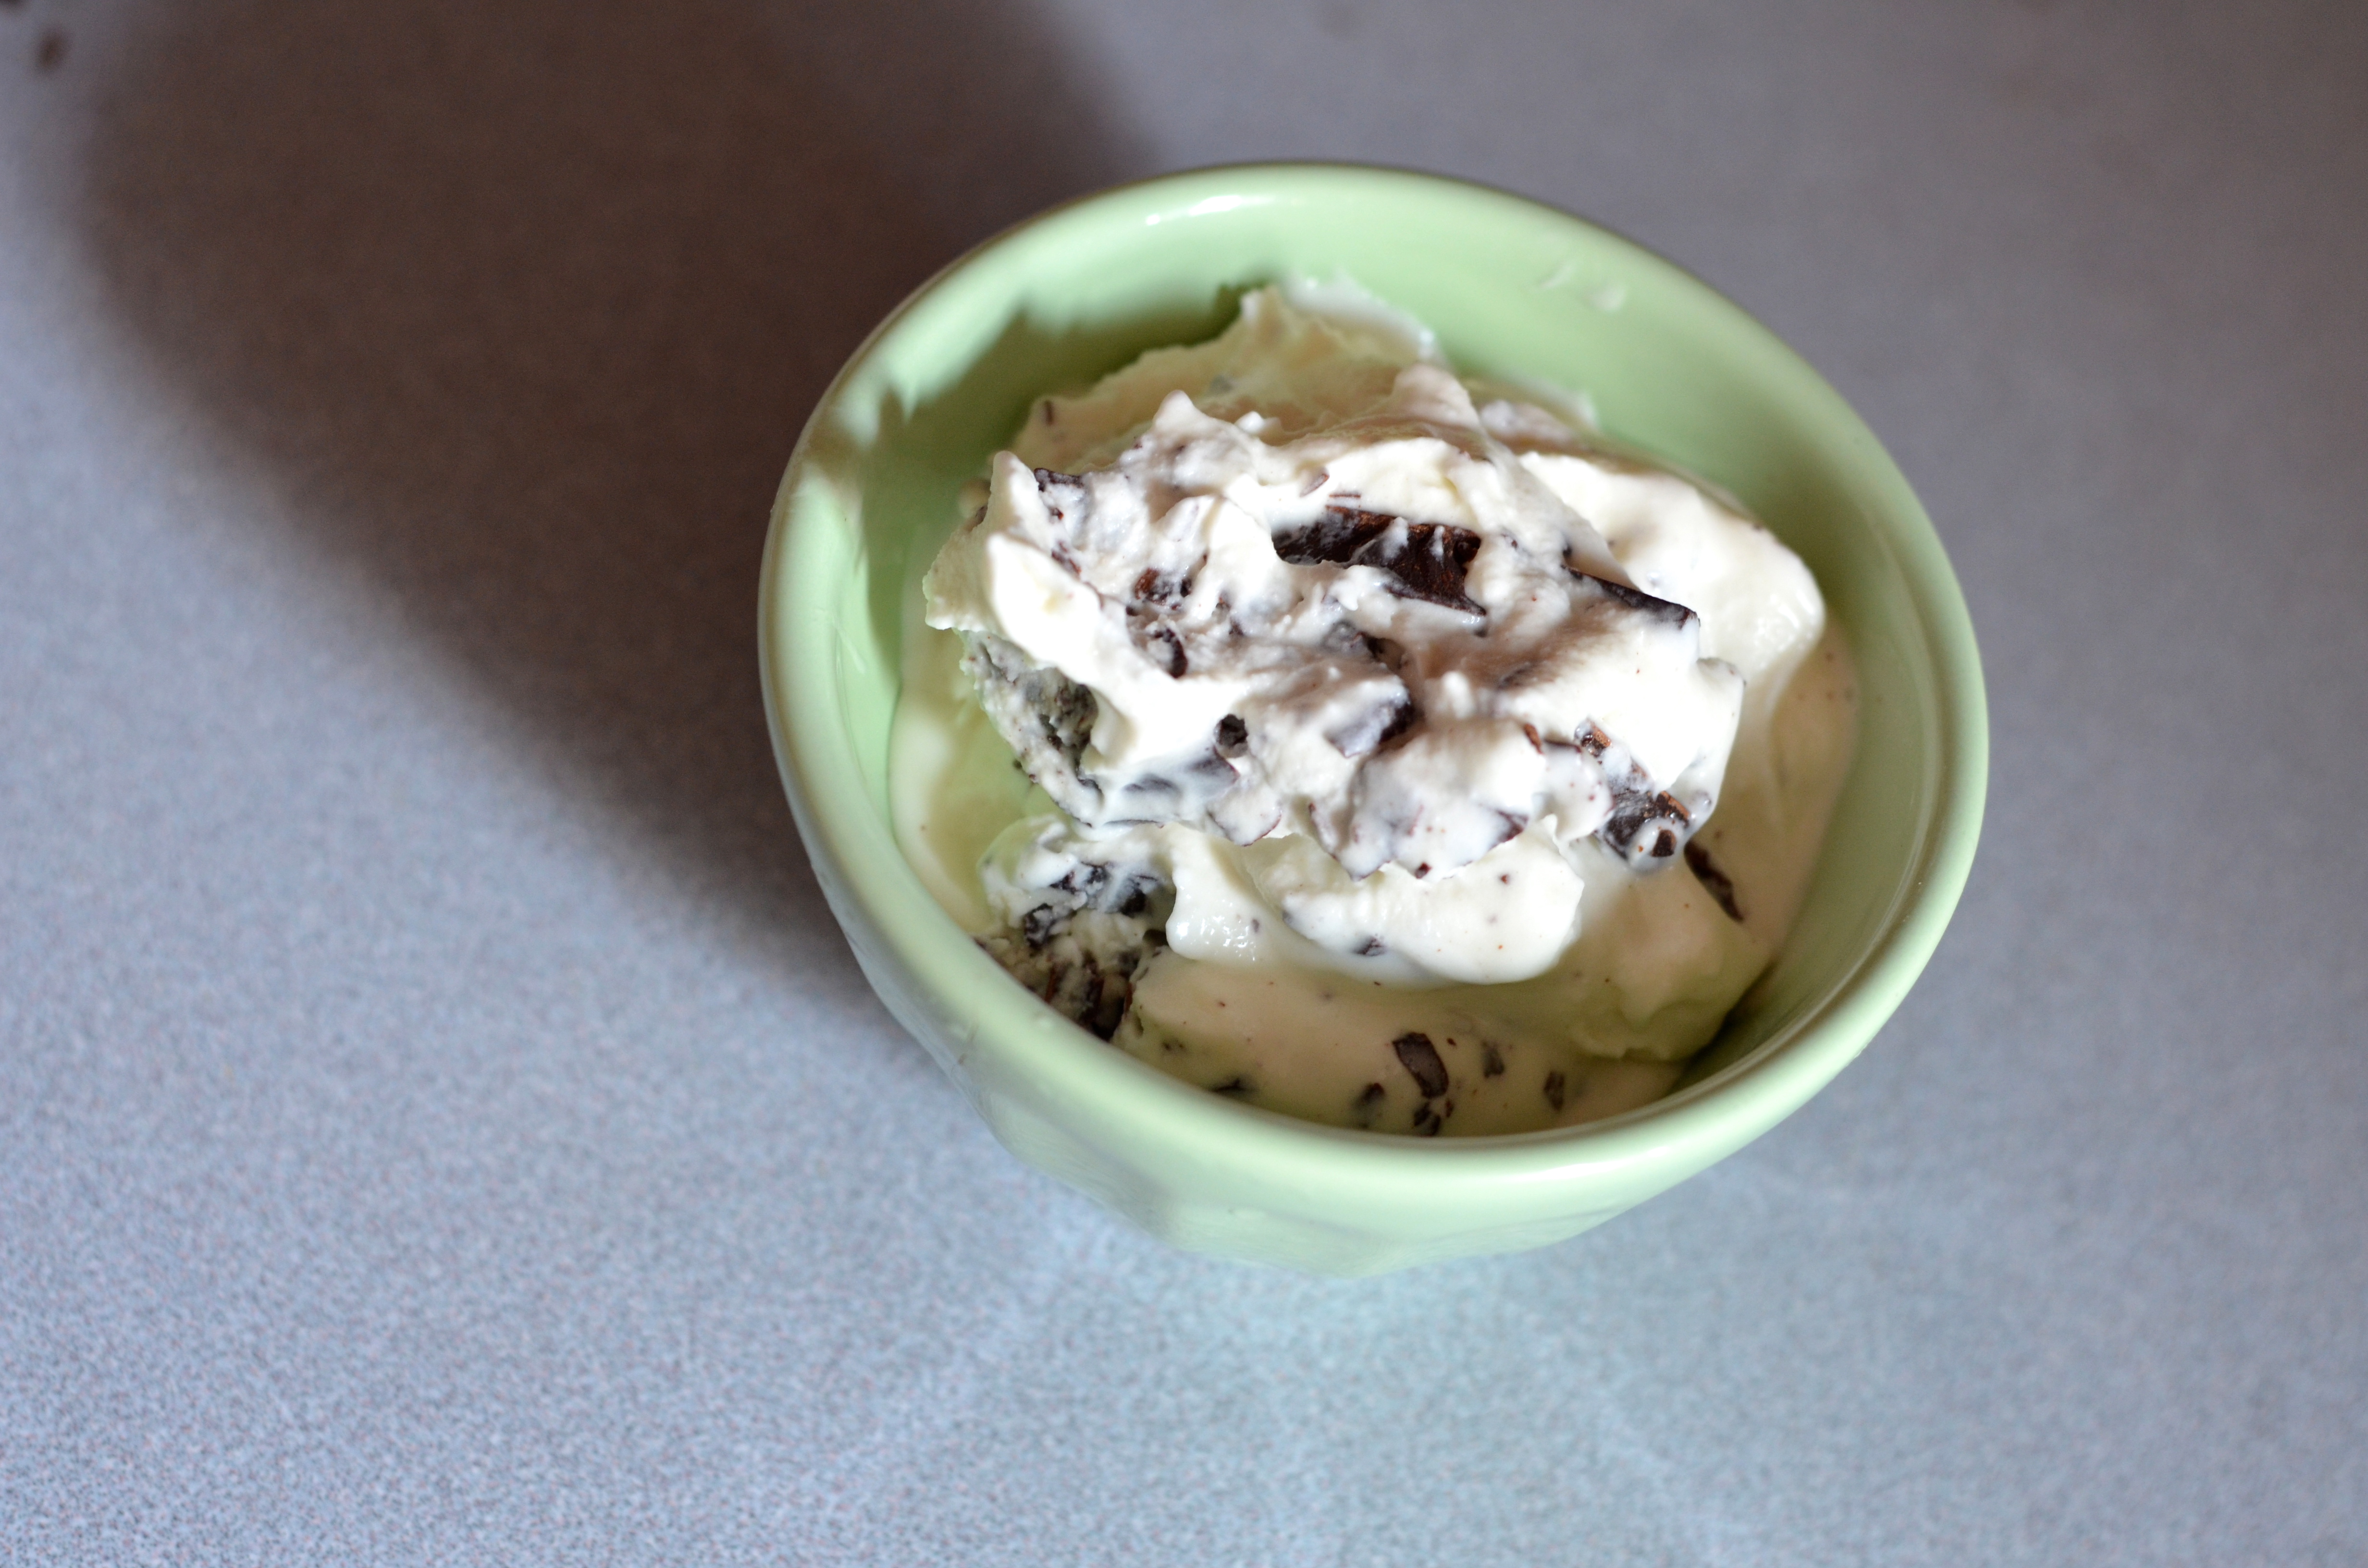
Mint Chocolate Chip Ice Cream - with fresh mintCombine the half and half, sugar and mint in a saucepan and heat until the sugar is dissolved, stirring occasionally. Mint Chocolate Chip Ice Cream - with fresh mintRemove from heat and let steep for 10-30 minutes. {the longer you let the mint sit in the cream, the stronger your flavor will be – I let mine sit a bit too long {closer to 30 minutes}, resulting in a stronger mint flavor than I was looking for, but it’s still delicious!}Mint Chocolate Chip Ice Cream - with fresh mint Remove the mint from the cream, straining if needed.DSC_0011 Chill your cream mixture thoroughly, overnight is best. {If you can’t wait, though, you can make an ice bath to speed up the process – place ice and water in a bowl larger than the one your mixture is in, place your cream bowl in the ice water and stir occasionally.}DSC_0012 Chocolate! I used a mix of Trader Joe’s Dark and 72% Dark, and the result was delicious!DSC_0015 DSC_0016 Chop your chocolate – I was looking for chocolate slivers and shards for this version, but any type of chop will work :)DSC_0019DSC_0005 Once your cream mixture is chilled, pour into your ice cream maker and freeze according to manufacturer’s directions, adding the chocolate near the end of the process.an easy Mint Chocolate Chip Ice Cream Recipe - made with fresh mint! And then, enjoy! How do you like yours – cone or bowl? Or straight out of the container? ;) I love how this recipe turned out! I think I’d like to try some chocolate mint next time instead of spearmint to strengthen the chocolate flavor … mmm! an easy Mint Chocolate Chip Ice Cream Recipe - made with fresh mint!

To celebrate the last {traditional} week of Summer, we are unveiling a new feature here on the site – a special selection of Special FindsHere you will find special, one-time finds with limited quantities that we have enjoyed in our home and are excited to share with you. We are looking forward to providing product reviews and also some “how-to’s” through the blog, and hope you enjoy them as much as we do. :) Our most recent find is {wait for it ……………} an ice cream maker! I hope that you enjoy these fun, brightly colored machines as much as we have ours. They are the electric, “ice-less” variety, which means that, if you store yours in your freezer as we do, you can have home made ice cream in under half an hour. Seriously, it’s the best! :)

Do you have plans for this last week of Summer? Will they include ice cream? ;)

Follow on Bloglovin

Christmas sewing re-cap, part 1

Christmas sewing re-cap, part 1

Those of you who follow me on Instagram might have seen the late night photos of the skirts I was making for the girls. {This being the first Christmas that we had two girls, of course I felt that they needed to have matching outfits :) I’d love sewing Christmas outfits for them to become a tradition!}

sewing Em's Christmas skirt

They were rather last minute, but even so came together just as I had pictured!

I used Oliver+S’s free Lazy Days Skirt pattern which I’ve used so many times that I know it by heart {it makes up so quickly – if you’re not interrupted, that is}. Of course, late at night I can’t quite remember how to do the ribbon hem, so I winged it {I’m pretty good at winging it}.

the Path Less Traveled: laying out and measuring

{please excuse the darkness of these photos – it was really late!}

First, I scrounged through my fabric looking for a length of some nice heavy-weight Black Watch plaid that I knew I had. Didn’t find it {I know it’s in there somewhere, though! Maybe I’ll find it for next Christmas’s outfits …}, but I did find an old dress shirt of my dad’s that would work nicely.

the Path Less Traveled: more measuring

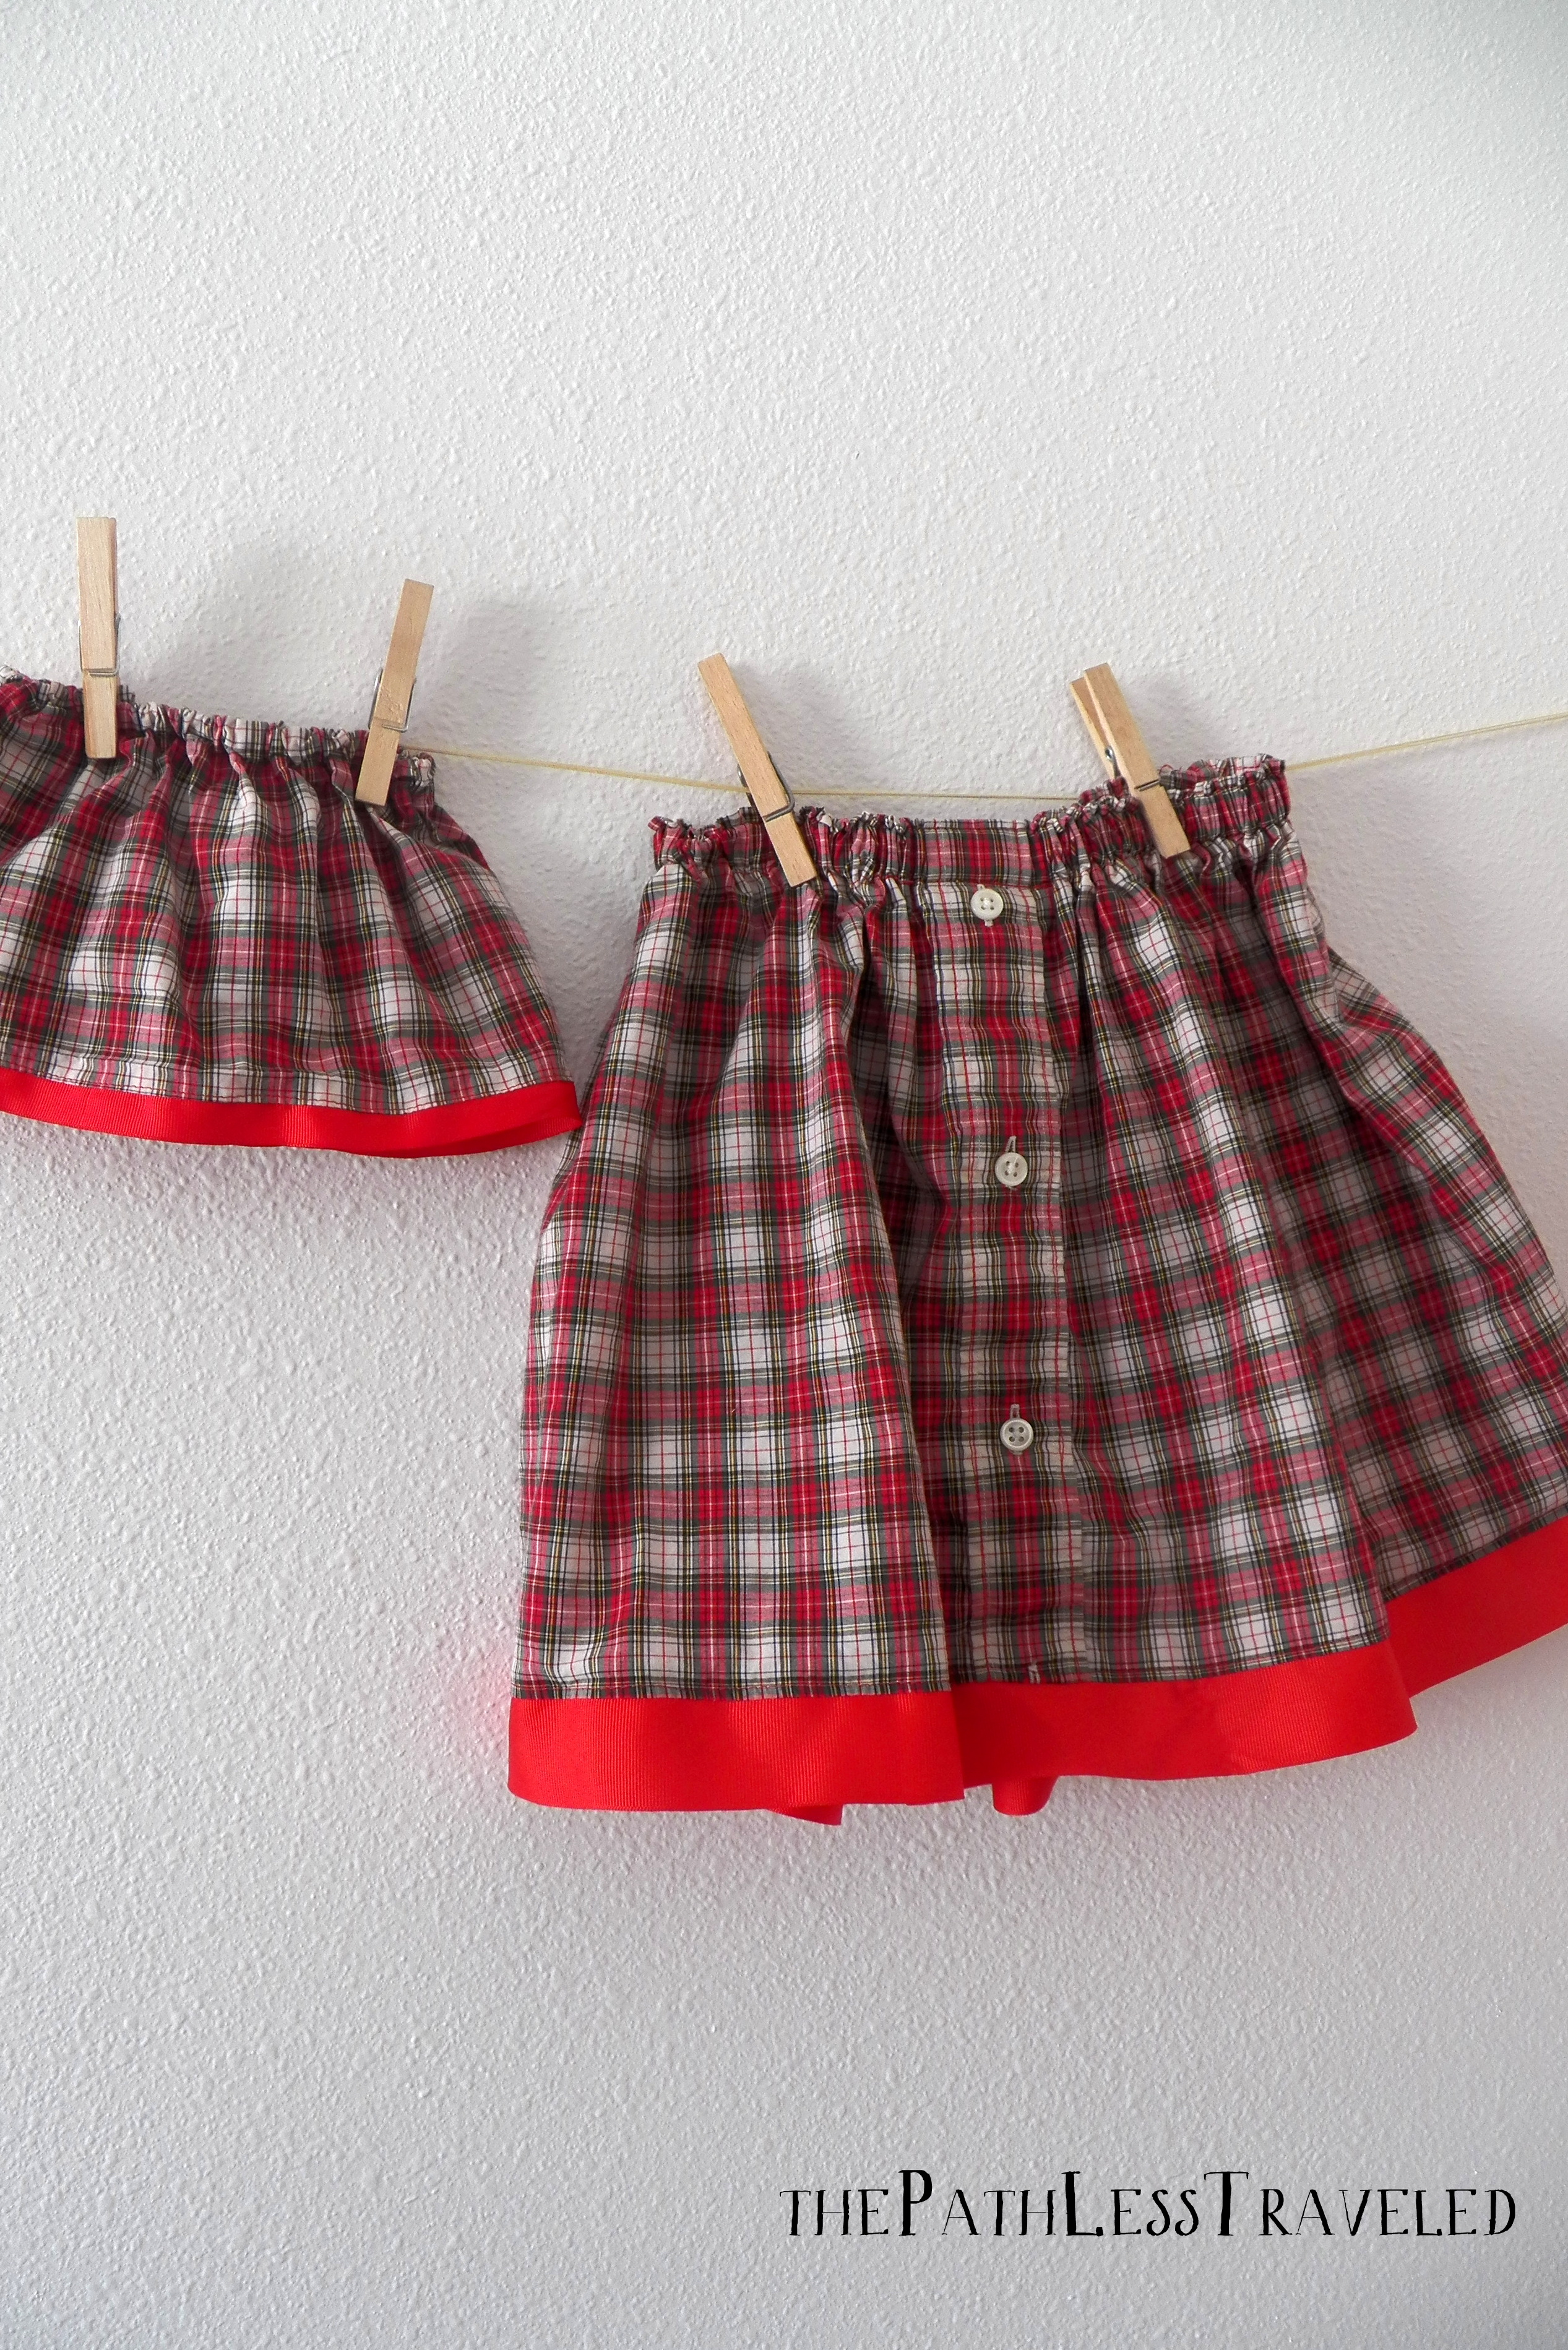
Then I measured – note my super accurate measurement technique of using the last Lazy Days skirt that I made for Emma Grace to check the length – and cut. I cut Em’s from the torso section of the shirt, and Olivia’s from one of the sleeves. Because I used the midsection of the shirt for Em’s, hers has a sweet feature of a button placket down the front which I thought classed it up just a bit. I sewed the placket shut so it’s non-functioning now, but if I make her a Lazy Days skirt from a shirt in the future I might leave it useable … it could be really sweet!

the Path Less Traveled: finished skirts

At this point, Olivia got hungry. It was already after midnight, so I told myself that I’d finish them the next day {hah!}. Well, it was a nice thought. Remember how I mentioned that this pattern works up pretty quickly when you’re not interrupted? Somehow I didn’t quite realize how many interruptions two toddlers and a newborn can give! Wonderful interruptions though they are. :) This set, instead of taking about an hour which they normally would have, took bits and snippets grabbed from 3 days.

the Path Less Traveled: finished skirts

I ended up finishing them at almost midnight Christmas Eve. Yep.

After we got two super excited children to bed and Olivia finally settled for a few hours I was able to get the sewing part done. Totally guessed as to the width of the waist bands, but they worked! They turned out so very darling.

the Path Less Traveled

I {re} dressed up Emma Grace and Olivia the other day to get some more photos of the two of them together – funny how in the busyness of Christmas day I didn’t get one where they were both smiling!

Coming soon, the onesie that I embellished for Olivia to wear with the skirt. :)

I hope you’re enjoying the new format of the blog over here on our site. I’m still learning all the ins and outs of it, and am enjoying the challenge!


Have a lovely weekend!


<3


more knitting for Baby – a cuddly cocoon

more knitting for Baby – a cuddly cocoon

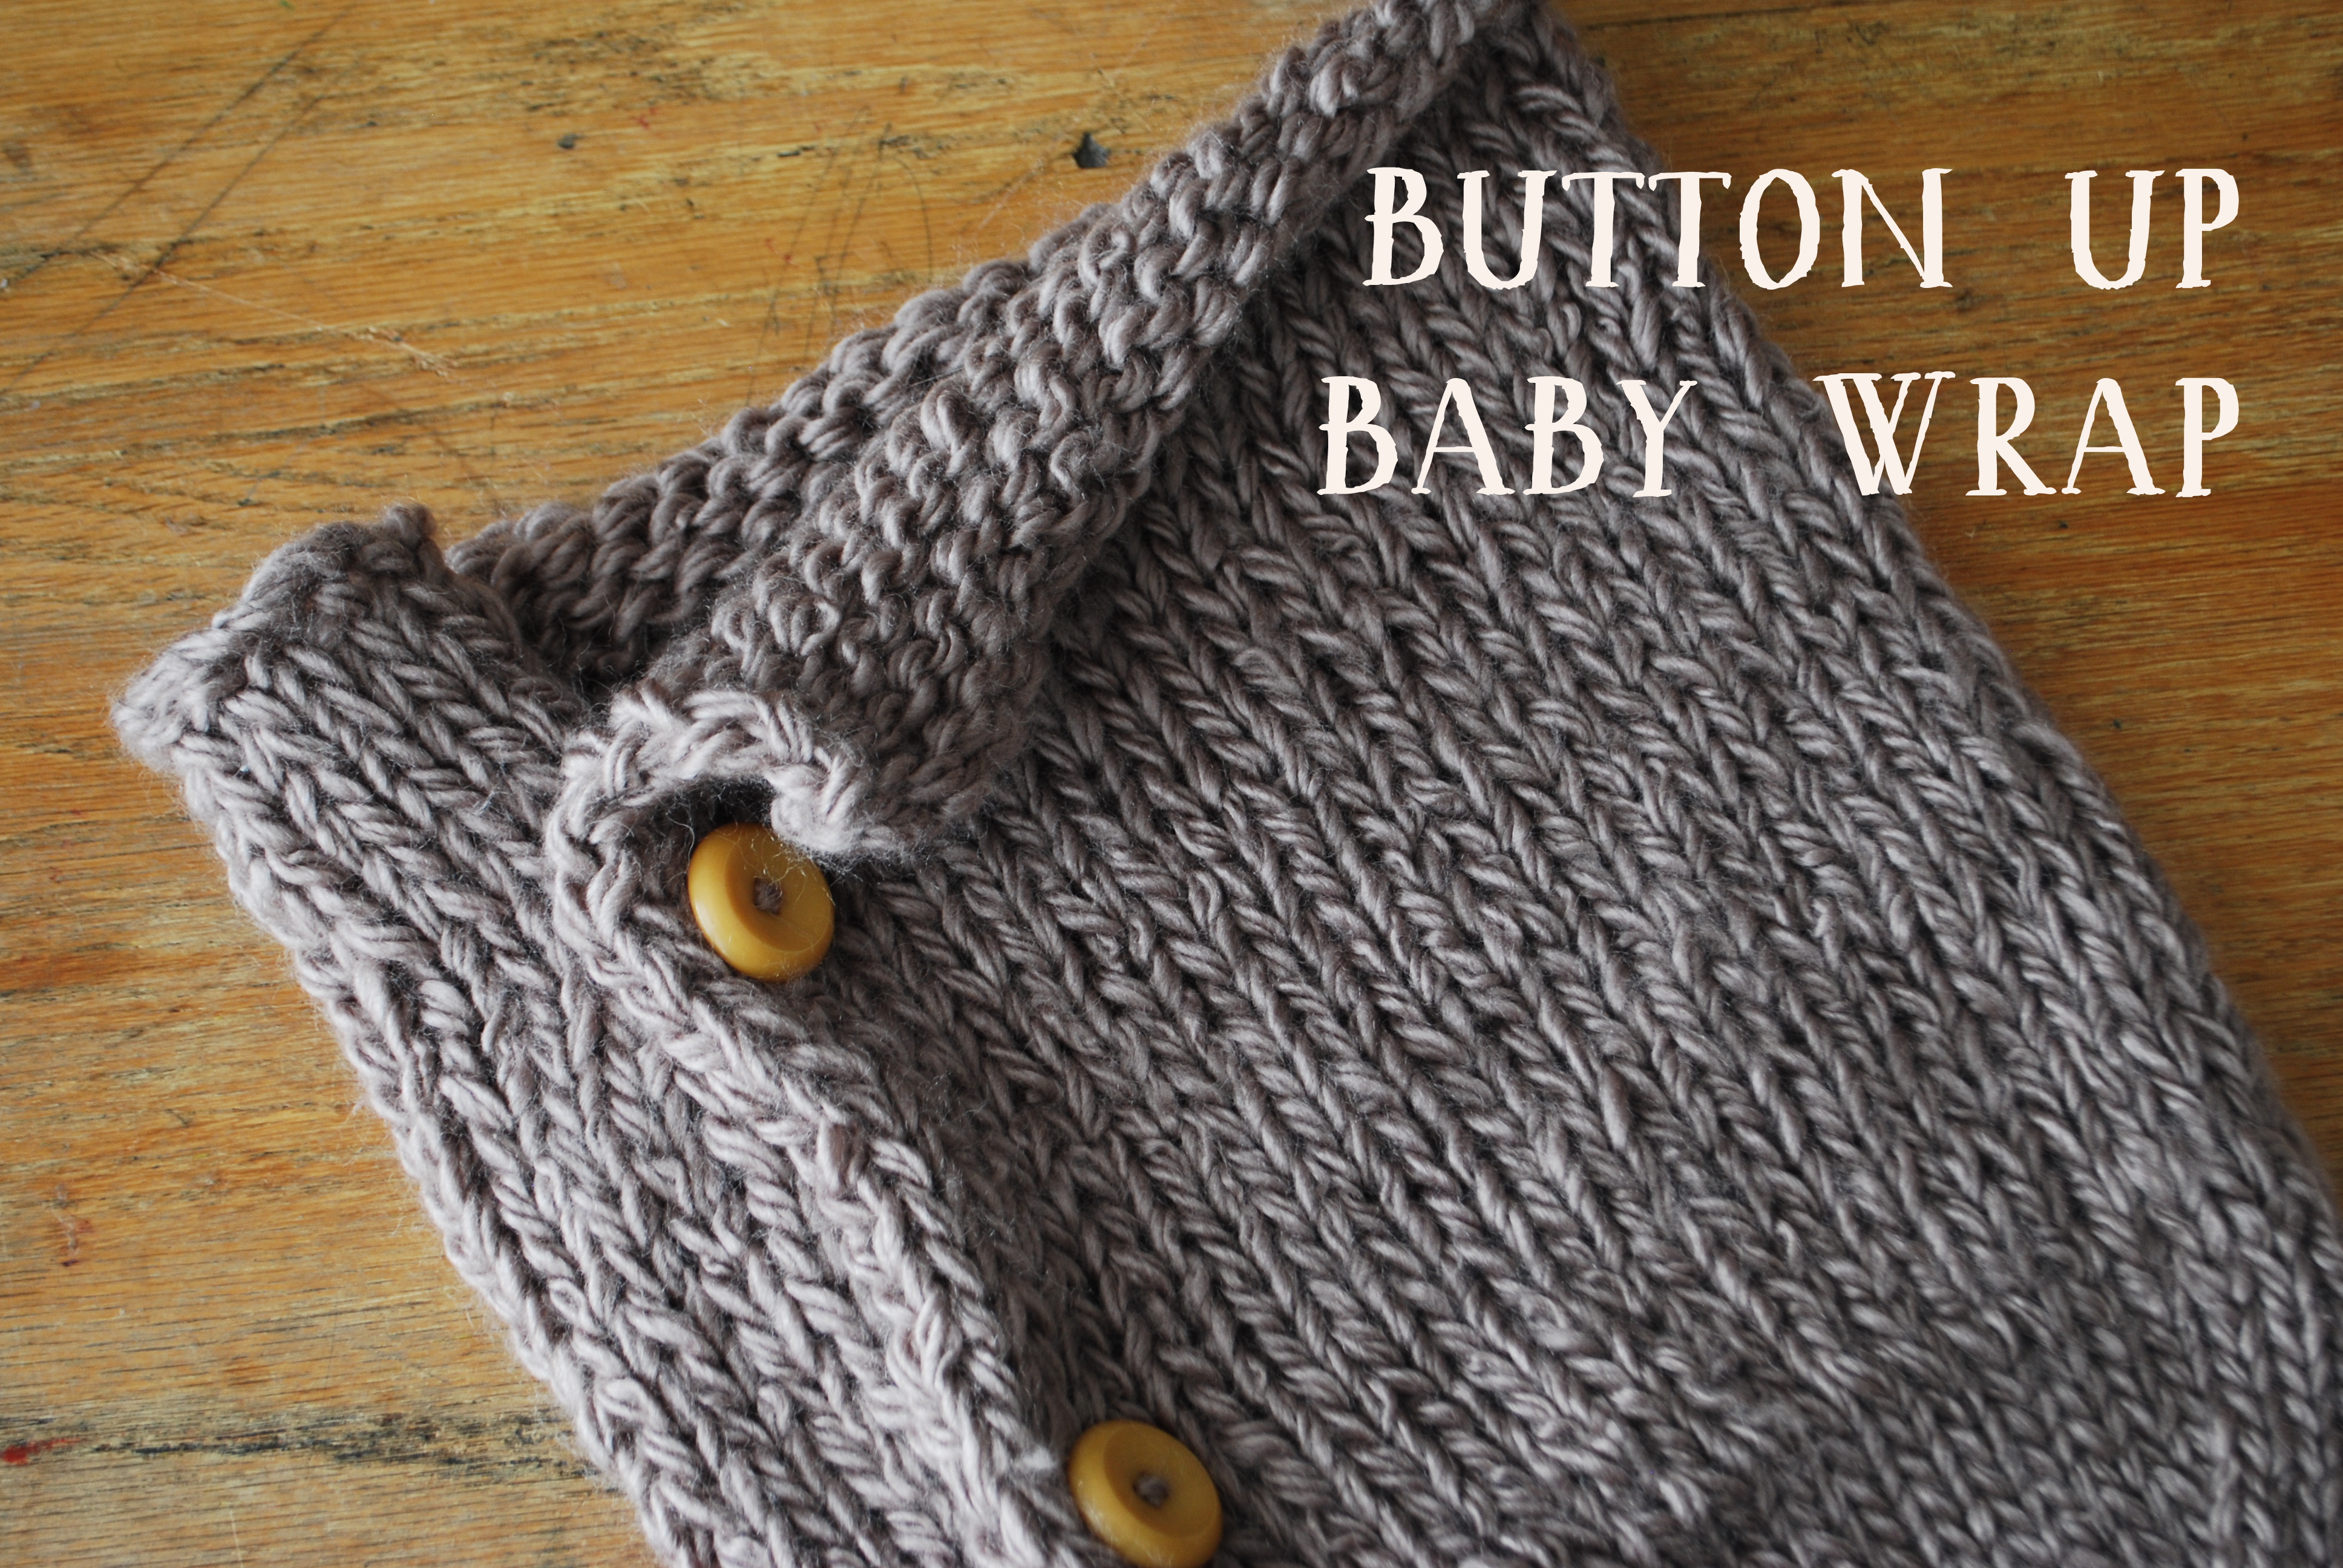
So, the up side of Baby delaying is that I’ve been able to get some of the things I had planned for her finished. :) Such as this sweet Baby Bunting:

Button Up Baby Wrap Pattern | the Path Less Traveled

Specs: Button-Up Baby Wrap, free Ravelry pattern
size 19 needles
triple ply yarn
The yarn is similar to Bamboo & Ewe and quite yummy. :)
A pair of vintage buttons – they seem to be similar to Bakelite, but I’m really not sure what their made of. Fun though!

Knitting for Baby - a cuddly cocoon | the Path Less Traveled

And there you have it! It was a quick knit, and fun to see it make up. My first project on needles this large, too!

And remember to stop by the facebook page early Monday morning to get the coupon code for 30% off of the shop!

<3

mmm, homemade granola

mmm, homemade granola

Yep, Baby Girl still hasn’t arrived.  Which means that I’m really nesting now. Baking. Sewing. Knitting. (but not cleaning – somehow I haven’t had a burning desire to get my 6-day-overdue belly bent over to clean things …)
And yesterday? I made granola. (and a few other things :D)

 (this recipe is from a woman in my MOPS group – thank you Cathy! I tweaked it just a bit)

1/3 cup oil
1/3 cup honey
1/2 cup brown sugar
1 tsp cinnamon
1 tsp vanilla
1/2 cup shredded coconut
2/3 cup nuts, roughly chopped
2/3 cup raisins (I used a mix of craisins and raisins)
2 1/2 cups oatmeal

  • combine sugar, honey and oil in a saucepan and cook until sugar melts and begins to boil. Add vanilla and cinnamon, remove from heat.
  • combine oats, coconut, nuts and raisins in a large bowl. Add sugar mixture, and stir until oats are well coated. 
  • Cover a jellyroll pan with foil (for easy cleanup) and spread oat mixture evenly in pan.
  • bake at 325 for 30 minutes, stirring twice during baking.
  • Store in an airtight container.

Once it’s cooled, you could also stir in other things – chocolate chips, perhaps?
 

And I also finally got around to making curtains for our kitchen window :)

rainy day fun

rainy day fun

I love Pinterest, but you know that by now :)
One of the wonderful things about it is that it’s an endless source of ideas for things to do with your kids when you run out of ideas (and here I thought I was pretty creative – some of these mommies are amazing!).

I found this idea for our afternoon’s “craft” one day just before I was about to make dinner, and the little ones were enthralled. They were so excited to get started that they forgot that mommy might need “help” over at the stove (the intended result – yay!). And then they asked to do it again an hour later! And they asked again the next day, and the next day. Good thing we buy our vinegar and baking soda in bulk : )

 The original instructions mention using eye droppers and food coloring along with the vinegar and baking soda. And that she would recommend larger dishes than the plates she used. So, we did!


knitting for Baby

knitting for Baby

 I’ve finally been getting some little mommy mades ready for Baby #3! One of the sweaters I had been wanting to make for her was the Puerperium sweater that I found on Pinterest, and when I found some sweet colored yarn to make it with it was only a matter of getting started (which is no small feat sometimes!).

 this little buddy is sooooooo excited to meet his baby sister :)

 I used “I Love This Cotton” in Rosy by Yarn Bee, knowing that it was heavier than what the pattern called for and would turn out just a bit bigger than the 0-6 weeks size the pattern was written for.
Well, it did turn out bigger. Probably about a 3-6 month size?
I’ll let you exactly how much bigger once she’s here to try it on. :)

 The buttons are vintage ones that I found at in a big jar at a yard sale a few years ago. They’re wood look-a-likes, but probably out of some hard plastic.

This sweater is so soft and cozy! I can picture it with leggings over a long-sleeve onesie with her rolls of baby chubbiness …… oh, can hardly wait!

If I have time before she arrives, I’m hoping to knit up another (with long sleeves) somewhat closer to a newborn size. It’s such a sweet and easy pattern, and goes quite quickly (once you actually start …. :D)

<3

a little boy’s cowboy party, part 2 – decor and party

a little boy’s cowboy party, part 2 – decor and party

Here’s the rest of Ian’s cowboy party (the first post is here)!
 
I used some of the blue jars to hold the silverware, and the plates were a bit of serendipity from Hobby Lobby (clearance! ye-haw!)

At the beginning of June I was 3 1/2 months pregnant and finally had my energy back. I had a bunch of ideas from my Pinterest idea board that I wanted to do – and actually got most of them done! Looking back, I should have taken more photos of the details (like cactus on the front door to greet our guests or the little cows and horses we dug out of the toy bin to scatter around the room), but these give an idea. :)

the view from our front door (can you spy the cactus? there are a few against the half walls)

looking from the table to the drinks bench, kitchen and the “chuck wagon” – I’ve added the red, white and brown star garland to the shop if you’d like one for your own cowboy :)

red, white and kraft stars
the red were from the dollar store, originally gold and silver foil from Christmas that I spray painted (and I think I like them better this way – can use them for the 4th and Christmas, too!) and the white and kraft are from this tutorial.
 
Cowboy Ian!

He and Em loved running back and forth under the “wagon”. It was simply a small folding table with a cloth, and John attached the cardboard “wheels” to the corners with twine.

What Western themed party would be complete without some “snakes”? :)

and of course, some silly stick on mustaches!

the cutest little buckaroos, ages 3 and 2 (the backdrop idea is from here), so excited for the party to start!

 he wasn’t too sure about our family birthday hat, though. :)

His favorite gift was the lawnmower. It was also the first to be opened – he was so enamored with it that we almost didn’t get to the rest of the presents!

Darling boy, we love you so much. You are all boy, but also a bundle of love and tenderness. This next year is going to be wonderful!