God makes beautiful things
“Beauty out of dust, beauty out of us”
amen
“Beauty out of dust, beauty out of us”
amen
You know the “Ideas” page on the blog? And how it’s getting rather, well, long?
Well, I finally made something from it!
I found the Heirloom Cut Chenille Baby Blanket on Aesthetic Nest a while ago and immediately knew that I needed to make one – or maybe more? – for my little ones.
It took me what seemed like forever (Ian has learned to sense when I’m sitting down at the machine and then decides that he needs to eat right NOW and that the blanket can wait!), but it’s finally done!
I used cotton seam binding instead of the satin blanket edging that she recommended since I wanted the whole thing to be 100% cotton, and I really, really love it. The “flat” side of the blanket is a light moss green with cream dots, and the chenille side is made of light green, yellow and cream. I’ve washed it a few times since it’s been finished (it is getting used!) and it gets a little softer each time.
Can I say again that I just love this blanket?
I’m linking to a few of these great craft blogs – head over and check out the creative ideas!
Well, hello there! It’s been a few days since I’ve posted anything …… but I have a good reason (I mean, other than being a mommy to two little ones, that is)! We took a week of vacation to visit family, and now are back. It was a good time of reconnecting with everyone,and my family especially enjoyed meeting Ian. His Grampa and aunts and uncles were completely smitten. :)
Things are settling into their routine again, the laundry is all washed and put away, and I am getting a few new things ready for the shop. One of the new items is something that I probably would never have made if it wasn’t for someone else’s idea.
A few days ago a woman over in England sent me a custom request for a garland that was similar to others that I have listed, but different – made out of fabric and white.
After a few emails back and forth, this is what we came up with:
I am so glad she contacted me – otherwise I might never have ventured into making something like this! It’s really gorgeous, fluttery and delicate. It reminds me of snowflakes, dandelions, and almond blossoms. And mini marshmallows. :)
It would be sooooo pretty adorning a wedding. Or a nursery. A party. A Christmas tree. A mantle piece or doorway. Above a headboard. Pretty much anywhere!
There are more in the works for the shop, and I might just squeeze time in to photograph and post a tutorial. Maybe. :)
Once again, I’m posting a link to this on a few of these craft blogs – head on over and check out the amazing ideas other people are posting!
Well, it sure is taking me a while to finish posting about what I made for the Challenge! Here’s the nightie that I made for Emma.
Emma’s much loved Disney Princess nightie was getting quite small on her, so I decided to refashion an adult sized nightshirt into a little nightgown for her. I didn’t take any photos along the way, but here’s how it turned out.
Using the Princess nightie as a pattern, I cut the original shirt down and cut off the sleeves and collar (all of which I saved to use).
I wanted to keep the original neckline and buttons down the front, but they were out of scale with a toddler’s body size – so I put in a cute little gather in the back! That took care of the neck sizing, but then the original collar was too big so I put three little tucks on each side of it.
If you’ve checked my Etsy site recently, you may have noticed that I’ve added some new autumn themed bunting to the shop! Sitting and cutting the 1″ circles and then stitching them together into yards and yards of streamer has been fun – and Emma has loved sitting on my lap and “helping” as I put them through the machine. :)
One of my garlands was featured in two Etsy treasuries yesterday – so fun!
And then today the other new garland was featured in a treasury (called “The Fall of Orange – A Day in October“) too!
I’ve been working away, although a little at time, on my daily hour+ commitment for the KCWC. It’s been so nice to have an excuse to sit down and make little clothes for my babies!
On Monday I made Emma a nightie using a nightshirt that I cut down and altered (pics coming in a later post). It turned out so sweet.
Tuesday, Wednesday and today I’ve been knitting up a little hat for Ian to wear this winter. His head is already a toddler size (big boy!), so the hats I was hoping he could wear are a bit snug on him. :)
The pattern I’m using is from Simple Knits for Cherished Babies and I’m knitting it up with Caron Country Merino Blend in “Silver Service” on size 6 needles (hoping that it’ll fit longer).
I’m linking this to some of these blogs :)
Hi there everyone!
This morning as I was scrolling the blogs I check regularly, I found a woman who is participating in this, and decided that I would join.
It’s a week long event – beginning today – that’s called the Kid’s Clothes Week Challenge. The idea behind it is that you make an article of children’s clothing (or articles) during it, working on it/them for an hour each day. Fun, huh?!
When I saw it this morning I thought, “now there’s something I can do!” So looking forward to it!

Click on over if you’re interested! All forms of “making” – sewing, knitting, crocheting, pattern making, cutting, planning, seam ripping… – count. :D
… today I made muffins (recipe found here on Joy the Baker).
Lemon Poppy Seed Muffins.
Mmm, mmm, mmmmmm.
(I’m posting a link to this post on a few of these blogs – head on over and check out the other fun projects!)
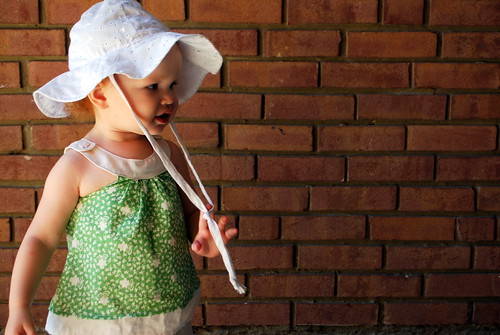
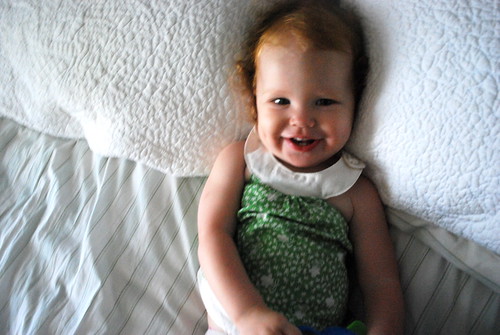
Emma has been shooting up like a little sunflower this summer! She’s outgrowing her clothes again (my baby girl is getting so big! *sniff*).

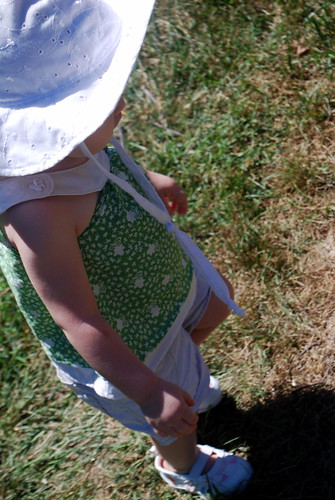
I just packed away all her tops that were mid-drifting on her and realized that she didn’t have very many left! Vemma is starting to take off but our budget is still pretty tight, so I didn’t feel like going out and spending money on clothing that she might only be wearing for another two or three months. Also, I had this cute fabric in the closet and had found this darling tutorial and free pattern on Prudent Baby ….. so Emma got a new top!

I used some darling quilting weight fabric for the “skirt” of the top, and bits of a linen blouse that I’ve been cutting up for the neckline and trim around the bottom. The pattern is made to have snaps instead of buttons, but I was out of snaps and, on top of that, there were some vintage bunny buttons in my collection that I’ve been wanting to use – so I finally did!

Emma enjoys the soft breeziness of the top, and I am loving the adorable little one it’s on. She seems to be getting more and more darling each day.
Linking to these parties – click on over and check out all the gorgeous fun-ness!
If you’ve ever had your scones turn out heavy and rather unappetizing, you might be thinking “hm, those look good but I can’t make them”. You can. I did. And they are sooooo light and creamy! I found the recipe over on Annie’s Eats (I really love her recipes!) and have made it over and over.
The main difference between this recipe and the other ones I have tried (and I have tried many) is that is calls for yogurt instead of cream or half and half. Maybe that’s what makes them so good?
These also freeze really well!
Directions:
In a small bowl, whisk together the egg, yogurt, milk and citrus zest until blended; set aside. In the bowl of a food processor combine the flour, sugar, baking powder, and salt. Pulse briefly to blend. Add the butter pieces to the bowl with the dry ingredients and pulse several times to cut the butter into the flour, until the largest butter pieces are the size of small peas. (If you don’t have a food processor, you can just as easily mix up the dry ingredients in a mixing bowl and cut in the butter using a pastry blender or two knives or forks.) Transfer the mixture to a large mixing bowl.
Add the strawberries to the flour mixture and toss to coat. Add the wet ingredients to the bowl with the dry ingredients and gently fold together with a fork or spatula until a sticky dough has formed. Knead just a few times to ensure that all the dry ingredients are incorporated and the dough is cohesive. (Only if absolutely necessary, add more milk 1 tablespoon at a time to hydrate the remaining dry ingredients.)
Transfer the dough to a well floured work surface and pat into a disc about 7-8 inches in diameter. Sprinkle lightly with additional sugar. Slice the disc into 8 wedges.
To bake the scones, preheat the oven to 425˚ F. Line a baking sheet with a silicone baking mat or parchment paper. Place the shaped scones on the prepared baking sheet and bake until lightly browned on top, about 15 minutes. Let cool a few minutes before serving.
To freeze, transfer the baking sheet with the shaped scones to the freezer and let them chill until they are firm, 30-60 minutes. Wrap the scones individually and store in a freezer-safe bag until ready to bake. Bake as originally indicated, adding a few minutes to the baking time (usually about 18-20 minutes for me.)