Browsed by
Category: tutorial

how-Tuesday – recycled crayons

how-Tuesday – recycled crayons

Have you ever thought of buying small packs of crayons to include in a gift for a child? or to stuff in a busy bag or child’s party favor bag? Well, today we have a quick, eco-friendly, child do-able {with a bit of encouragement and supervision from an adult}, perfect for Earth Day how-Tuesday project – recycled crayons! And, assuming you have crayon bits already, it’s free {always a win!}!

One of the lovely things about this project is that you can make the crayons into whatever shape you choose to suit your theme or the child’s interests – having a beach themed wedding? Use a sea creature or shell shaped mold and viola! Custom shaped crayons!

materials needed: crayon pieces, mold {we used a mini muffin tin with silicon liners – you can also use a greased muffin tin, a silicon candy mold, or even small cookie cutters on a foil lined baking sheet}, an oven

making recycled crayons via the Path Less Traveledstep one: prepare your crayons. Unwrap the one ones that still have paper on them, and, if needed break them further down so that they will fit in your mold
making recycled crayons via the Path Less Traveled

 *note: if the crayons have gotten hot {such as in the diaper bag that you might have left in your car? *ahem*}, peeling off the paper might take a bit of work :)making recycled crayons via the Path Less Traveledstep two: arrange your bits in the mold – we chose to arrange by color, but you might decide to do a variety together – the combination options are endless!making recycled crayons via the Path Less Traveleda little artist hard at work {i’ve been told that I make the same face when I’m concentrating on my work ;)}making recycled crayons via the Path Less Traveledstep three: preheat your oven to 275* {135 celsius} and put in your mold. This little guy was soooo patient!

making recycled crayons via the Path Less Traveledthe pan after about 3 minutes

Keep an eye on your crayons – the wax will smoke once it has completely melted {ask me how I know ;)}

making recycled crayons via the Path Less TraveledStep four: Pull them out of the oven and let them cool. They will be cool enough to handle after a few minutes, but will take just a few minutes longer before they are “set” entirely through.
making recycled crayons via the Path Less Traveled
 Step five: enjoy! At this point they are ready to package or use to color with … we did a bit of both :) My little ones love coloring with these larger sized crayons!

I’d love to hear if you try this and what you do with your new shapes! A collection of multicolored Lego men marching through the crayon box, perhaps? Or maybe some colorful hearts to remind your guests of your special day? Might I suggest using some bags like these to package them? They’d be so lovely!

blessings for a lovely day,

XO

p.s. there will be a giveaway tomorrow!!!

p.p.s. would you like to see more posts like this? sign up for my updates and you’ll receive my newest content and exclusive deals in your inbox!

{I’m sharing this on Today’s Creative Blogthe Girl Creative,  Sew Can DoA Vision To RememberSkip To My LouSew Chatty and C.R.A.F.T.}

Follow on Bloglovin

How-Tuesday: anniversary keepsake art

How-Tuesday: anniversary keepsake art

anniversary keepsake art via the Path Less Traveled Come this Friday, my husband and I will have been married for 5 years. 5 amazing years!

To celebrate that milestone, I have a sweet anniversary keepsake that I’d like to share with you for today’s How-Tuesday – of course, it doesn’t just have to be for an anniversary. You could make a version of this for any special photo: an engaged couple, babies, graduations …. just switch out the marriage vows for a quote or poem and viola! A new piece of art to grace your wall {or to use as a gift – this would make a lovely, cherished gift!}.

anniversary keepsake art via the Path Less Traveled materials needed: your marriage vows {or whatever poem/quote that you’d like to use}, lined paper, vellum {or tracing paper}, a fine point pen, your photo, a frame

optional materials {not pictured}: photo corners, photo matanniversary keepsake art via the Path Less Traveled You’ll need to determine the area that you’d like your writing to cover – if you’d like it to go all the way across your frame or just be centered over your photo. Place your vellum over the lined paper and start writing. {or maybe, if you’re nervous, practice on some scratch paper before starting on the vellum} Take your time! anniversary keepsake art via the Path Less TraveledOnce you’ve finished writing – being careful not to smudge the ink as you go along – you can put the layers of the art together. I used an 11×14 frame with a 4×6 photo, and so of course need a mat to fill out the frame. :) The layers, as I stacked them, are: glass, vellum, mat, photo, cardboard reinforcer that came with frame and frame back.

– Because I chose to place the vellum over the mat instead of under it, I used white photo corners to anchor the corners and add another layer of texture.

Once you have the layers adjusted to your satisfaction, carefully pop them in the frame and secure it. Then either wrap it {if using as a gift} or display on your wall – you’re done!


I can hardly believe that 5 years have already gone by – being married to John has been a blessing each and every day.

This project is a great way for us to be able to see {and be reminded of} our vows on a daily basis, and it has the added effect of renewing my gratefulness for him when I see how he’s fulfilling his vows on a daily basis. God gave me a winner! The congregation at our wedding laughed as I jumped with giddy joy when I heard John say “I do”, and I love being reminded of that moment – and his continuing faithfulness – each day!


xo

Did you miss the coupon I shared yesterday? If so, you might like to click over and check it out – it’s a good one!


{I’m sharing this on the Girl Creative, Sew Can Do, A Vision To Remember, Skip To My Lou, Sew Chatty and C.R.A.F.T.}

How-Tuesday (on a Thursday): DIY Egg Centerpiece

How-Tuesday (on a Thursday): DIY Egg Centerpiece

Have you ever wondered how to make eggs stand up without using those darling little egg cups? Well, today I’ll show you how :) And yes, today is Thursday, not Tuesday … {life … happened. I’m sure you understand}.

This project is perfect for all sorts of celebrations: Easter, Earth Day, baby showers or farm-themed birthdays – and if you use the eggs as vases for tiny arrangements, the list grows even more. You could even adapt these to use as mini herb pots on your kitchen windowsill!

DIY Easter Egg and Grass Centerpiece via the Path Less Traveled

The materials for this project are very simple:

– egg shells {either empty for vases or with grass growing in them}

– a candle

– matches

– a platter {or whatever you’d like the eggs to be stood on}

DIY Easter Egg and Grass Centerpiece via the Path Less Traveled

Step one: Light your candle

DIY Easter Egg and Grass Centerpiece via the Path Less Traveled

Step two: find where you’d like your first egg to be placed and tip your candle so that the hot wax drips on the exact spot {holding your candle at a slightly upside down angle – 100-110 % works well – allows the flame to melt your candle quickly so that you can work before your pool hardens. Experiment a bit and find the method that works for you :)}

DIY Easter Egg and Grass Centerpiece via the Path Less Traveled

Step three: Quickly press an egg in the center of this puddle, holding it upright for a few seconds until the wax hardens.DIY Easter Egg and Grass Centerpiece via the Path Less Traveled

Repeat step three until you’ve completed your arrangement, and then step back to admire. :)

DIY Easter Egg and Grass Centerpiece via the Path Less TraveledEnjoy! I’d love to hear how yours turn out. :)


<3


How Tuesday: Faux Gilded Easter Eggs

How Tuesday: Faux Gilded Easter Eggs

Have you been noticing the gilded trend lately? I’m not sure about you, but I’m loving it. There’s real gilding and there’s faux, and they’re both really lovely.

There are tutorials on the web for real gilding, and, if using gold leaf isn’t your thing or scares you, you can even find some really lovely gold {or silver, or bronze} paint that is quite convincing. Or, if you’re at home and don’t want to venture out in the snow just to get some gilding materials, you can also use in ink pad. Yep. I know because I tried. You’re welcome. :)

This is super quick, and, if you happen to have the items already in your closet {what do ya know, I did!}, free! Or, if you don’t have them already, the paper mache eggs were originally 50% off of $0.34 each at Hobby Lobby, and the ink pads were $1-ish at Michael’s, so …. pretty cheap. :) Of course, you could also use real eggs, which would be quite lovely too. Maybe tomorrow I’ll try it with real ones – and then hang them from the ceiling, like {this}.

DIY faux gilded Easter eggs via the Path Less Traveled

materials needed: ink and eggs

DIY faux gilded Easter eggs via the Path Less Traveled

step one: press your egg onto the ink, rolling it around a bit. Repeat on each side until the egg is covered. Depending on the quality of your ink pad, you might need to give it a few coats.

DIY faux gilded Easter eggs via the Path Less Traveled

Chances are your fingers will look like this by now. Totally normal. :)

DIY faux gilded Easter eggs via the Path Less Traveled

Repeat step one with each of the eggs.

Step two: Find a clear vase to display them in. Admire them. And see if the shimmer washes off of your hands. :)

DIY faux gilded Easter eggs via the Path Less Traveled

That’s it! One of the lovely things about using an ink pad instead of gold leaf or paint is that dry time is non existent and clean up is a breeze – not even any brushes to wash!

Imagine how you could use this trick in other projects – maybe “gild” the edge of some invitations, or, using a color instead of shimmer, add a splash of color to some disposable flatware?

Have you been doing any projects to add to your decor this spring? If so, I’d love to see them! Just add a link in the comments section. :)


XO

How Tuesday: growing Easter grass

How Tuesday: growing Easter grass

Have you seen how some people  {Design Mom has a few sweet posts on it} have grown their own Easter grass? No? It’s a super sweet idea, and this year I decided to give it a try! It’s a simple but meaningful way to add a special touch to your Easter celebrations. It’s a great object lesson for children about new life and putting something “dead” into the ground and watching God make it come to life. Kind of a nice segue into talking about the Resurrection :)

note: If you do this NOW you’ll have some darling little pots of real grass for Easter. Or, you know, if you start the wheatgrass growing in the next few days …. :) {if you’re like me, it works better to tell yourself that it needs to be done NOW – that way it will actually get done, maybe not “now”, but at least soon}

growing wheatgrass via the Path Less Traveled

It turns out that growing wheatgrass is really easy. All you need is some wheat, some water and some dirt {and maybe a container to put the dirt in}. Yep, really easy.

Step one: soak your wheat berries/seeds for a few hours or over night. This isn’t truly needed, but does speed up the sprouting process.

growing wheatgrass via the Path Less Traveled

Step two: gather your containers and dirt. I chose to use some egg shells for some of the containers – when the grass is a little taller I’m going to make a centerpiece for our table like this one {you should click over – it’ soooo pretty! I wish it was my idea first :)}

growing wheatgrass via the Path Less Traveled

If you choose to use egg shells, simply tap your egg all the way around near one end instead of in the middle as you’re cracking it, and rinse out the shell after you’ve dumped out the white and yolk.

growing wheatgrass via the Path Less Traveled

Step three: fill your containers with soil. If you’re using a pot without a drain hole, place small rocks or packing peanuts in the bottom to provide some drainage and keep the seeds from rooting.

growing wheatgrass via the Path Less Traveled

Step four: place your wheat berries on top of the soil, covering the surface with an even layer, and then cover the wheat with more soil.

growing wheatgrass via the Path Less Traveled

Step five: water and wait. The seedlings should emerge in about 48 hours or so. Continue watering every day as it grows, and enjoy the bit of green!

growing wheatgrass via the Path Less Traveled

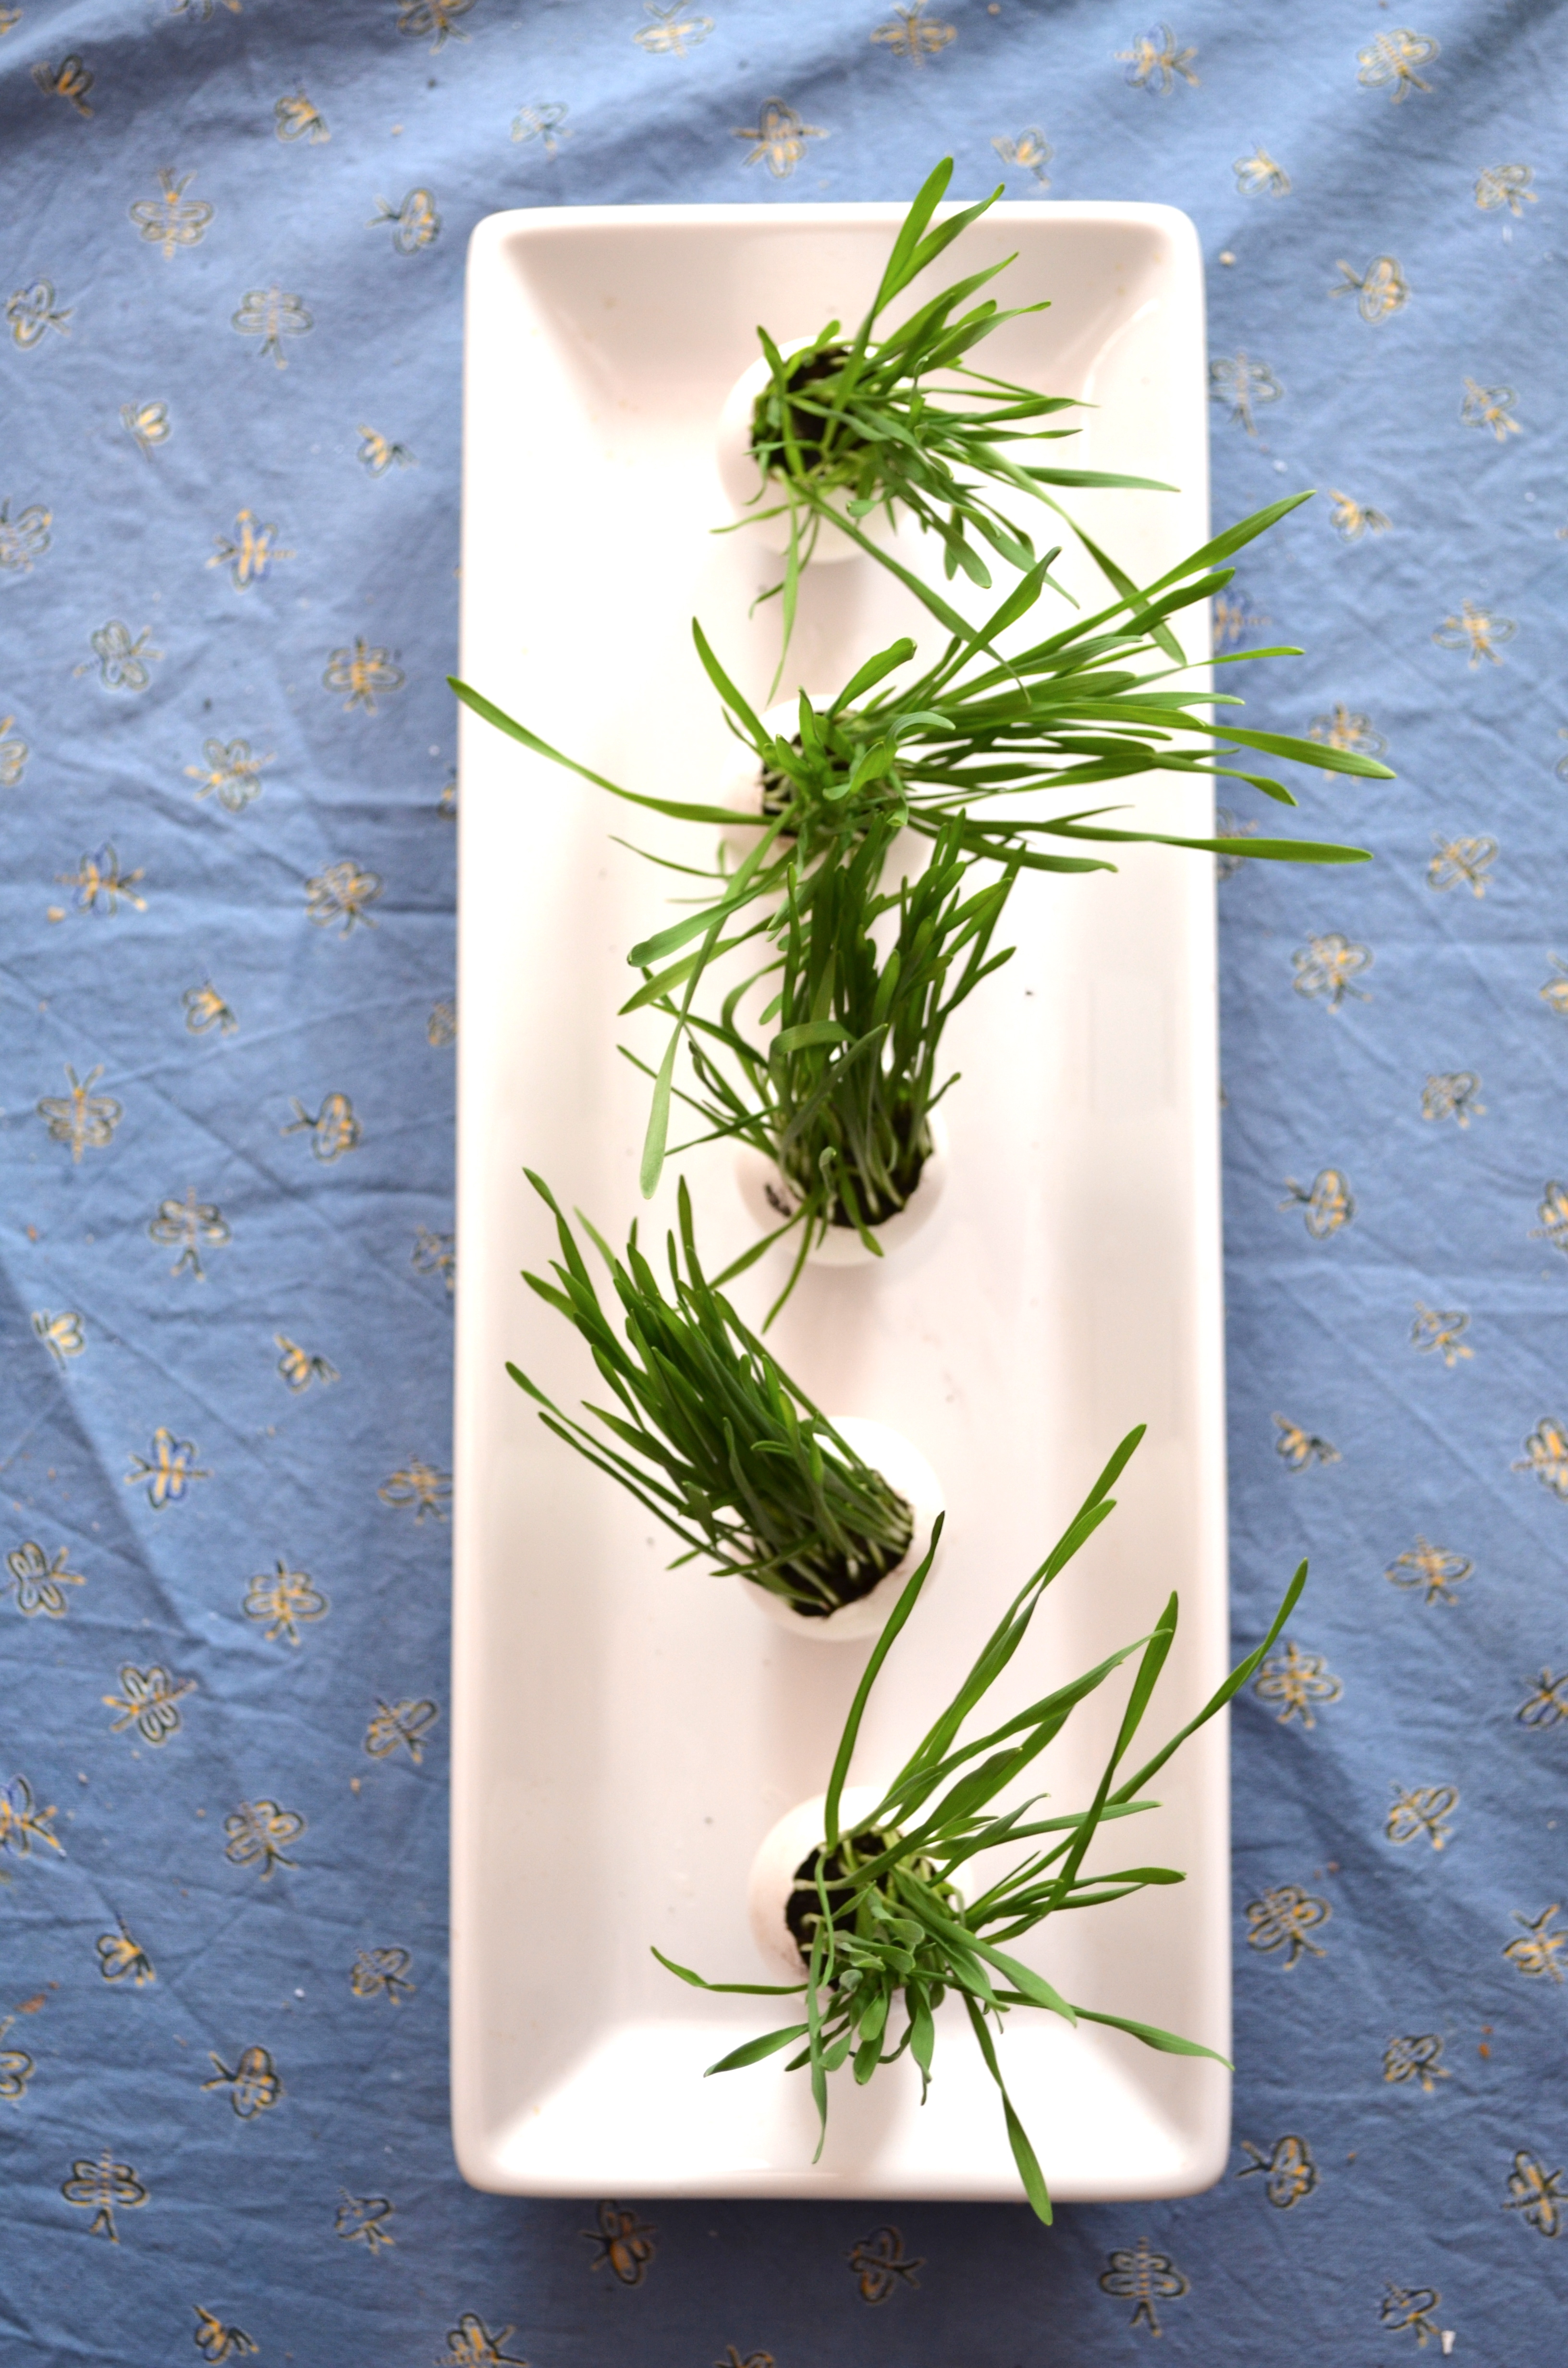
These are the eggs five days after planting – by the time Easter is here, they may need a trim! I’ll clean up the shells in a few days once the sprouts are a bit sturdier and use some wax to create the centerpiece I mentioned. Maybe I’ll post a photo when it’s done!

Let me know if you try it!


<3


How-Tuesday: Party Ceiling Pouf

How-Tuesday: Party Ceiling Pouf

There has to be a better name for it, but for now I’m calling it “Party Ceiling Pouf” {really, any of you have suggestions? Let me know!}

image via Lindsay Meinhart on Pinterest

I found this photo on Pinterest a while back, and when we started working on the pink princess party, I knew it would have to happen. Of course, when I was making it I just winged it and didn’t click through to see if there was a tutorial for it. :) After I was finished I found out that wasn’t a tutorial {yay for figuring things out on your own!} but one of the commenters suggested cutting the table covers in half the long way to double your “streamers” – even so, I think it turned out really sweet!

Easy Party Ceiling Decor Tutorial

I picked up all the materials {except for the tissue poms which I borrowed from the kids’ bedroom :)} at the Dollar Tree, and the entire project came to $5 – a huge impact for a small price!

materials for a party ceiling pouf via the Path Less Traveled

 materials: plastic table cloth, wire star garland and thumb tacks {all pictured} tissue poms or balloons and twine or fishing line {not pictured}

instructions for party ceiling pouf via the Path Less Traveled

step one: remove the table cloths from the packaging and gather half of one end in your hand.

step two: find where you want the “center” to be, climb up on a step stool and tack it up …

instructions for party ceiling pouf via the Path Less Traveled

… like this.

step three: Gather and tack up the other side of the end, then do the same with the opposite end.

Repeat with the other three table cloths, making a “+” shape on the ceiling.

DIY Party Ceiling PoufOnce you’ve used all four table cloths, you can stop there or continue on like I did and add a touch of whimsy and sparkle {which, it turns out, thrills little 4-year old girls!} by adding strands of the star garland along the underside of the draped cloths.

Easy Party Ceiling Decor Tutorial

step four: gather your tissue pons {or balloons} and, using twine or fishing line, hang them in a bunch in the center to provide a focal point and hide the bunching :)

step five: step back and admire your work :)

that’s it! Super simple with a huge impact – and a great way to make your celebration special.

xo

her pink princess party

her pink princess party

Ah, little girls. When they love something, the LOVE it, all the way. And our little princess Emma Grace LOVES pink and princesses and parties. {when asked who her favorite princess is she has no answer – they’re all her favorite!} She doesn’t really care if they’re Disney or otherwise, but if it’s a princess or pink, she is in LOVE. :) The only thing better is when it’s a pink princess – Sleeping Beauty? Score! Arielle, who wears a pink dress and has “orange hair like me!” is quite wonderful, too :)

And so, when we started talking about her birthday a few months ago, just about the first thing out of her mouth was “princess! pink princesses” {and none of us were surprised :)}

DSC_0050

– a tiny gold tiara for our 4 year-old princess –

I made up a Pinterest board with party ideas, and the ones she liked best were {can you guess?} PINK and had princesses in the photos. I’m not a huge fan of licensed characters, so we picked out lots of things that were more “princess-ey” than Disney-ish to try. Out of her favorites, we picked a bunch of ideas, and a few of them actually got done :)

DSC_0065

-a tiny gold crown adorning one of her baby photos and the crown I made for her to wear-

DSC_0055

– lots of pink! the ceiling pouf idea {tutorial here} came from {this} pin, the materials from Dollar Tree and the tissue poms from the kids’ room –

DSC_0062

– ribbon and bell wands {our Emma Grace loves these} with lots of soft colors, and enough pink to make her very, very happy –

DSC_0175

– the dessert table –

pink lemonade, punch, {these cookies} and {these rice crispy treats}, the princess poster is from Dollar Tree

We decided to celebrate her day with family and as we were scheduling, realized that the best thing for everyone would be to gather on the evening of her birthday, a Tuesday, for desserts and cake. I did my best to make things ahead and then set aside her birthday to love on her and get the party ready, but ah, the best laid plans :)

We did lots of loving on her {each time I would snuggle her and say “happy birthday! you’re 4 now!” she’d say, “awe, thanks mommy” with the sweetest little smile :)}, but by afternoon nap time I was running a bit behind! My sweet sister-in-law came over to help me pull the loose ends together {thank you again, Sarah!}, but one of the things I forgot was to charge the camera battery – hence some of the detail photos {like of the desserts, the piñata before it got smashed …} didn’t get taken. You’ll have to use your imaginations. :)

the Path Less Traveled: cute little Princess

All in all, it was a very sweet party to celebrate the sweetest four year old princess ever – and she was delighted. Which was the entire point of the party!

She had soooo much fun “helping” to set it up {we are still enjoying some of the decorations – I’m kind of loving the extra pink in our house :)} and I enjoyed making the things and “shopping the house” to find the decor {I actually only spent about $9 on the decorations – can you believe that?! the rest we already had around the house – score!}.

DSC_0047

– favor bag tutorial {here} –

I have a few how-to posts planned for some of the decorations, so stay tuned! And I’d love to hear how you and your families do birthdays – do you go all out on themes? or sweet and simple with just a cake {or birthday person’s choice of dessert}?

How-Tuesday: Pink Princess Party favor bag tutorial

How-Tuesday: Pink Princess Party favor bag tutorial

the Path Less Traveled: Pink Princess Favor Bag tutorial

Hello everyone! Yep, it’s time for How-Tuesday again – and this time I’ll show you a {sort-of} tutorial on how I made these darling favor bags for Emma Grace’s pink princess party {I’ve got a few more posts about her party planned – it was so sweet!}. Ready?

I had seen {these and these} sweet treat bags on Pinterest and knew that they’d be perfect for sending the favors home with Em’s guests. {the favors were these molasses crinkle cookies – Emma Grace frosted them herself :)}

the Path Less Traveled: Pink Princess Favor Bag tutorial

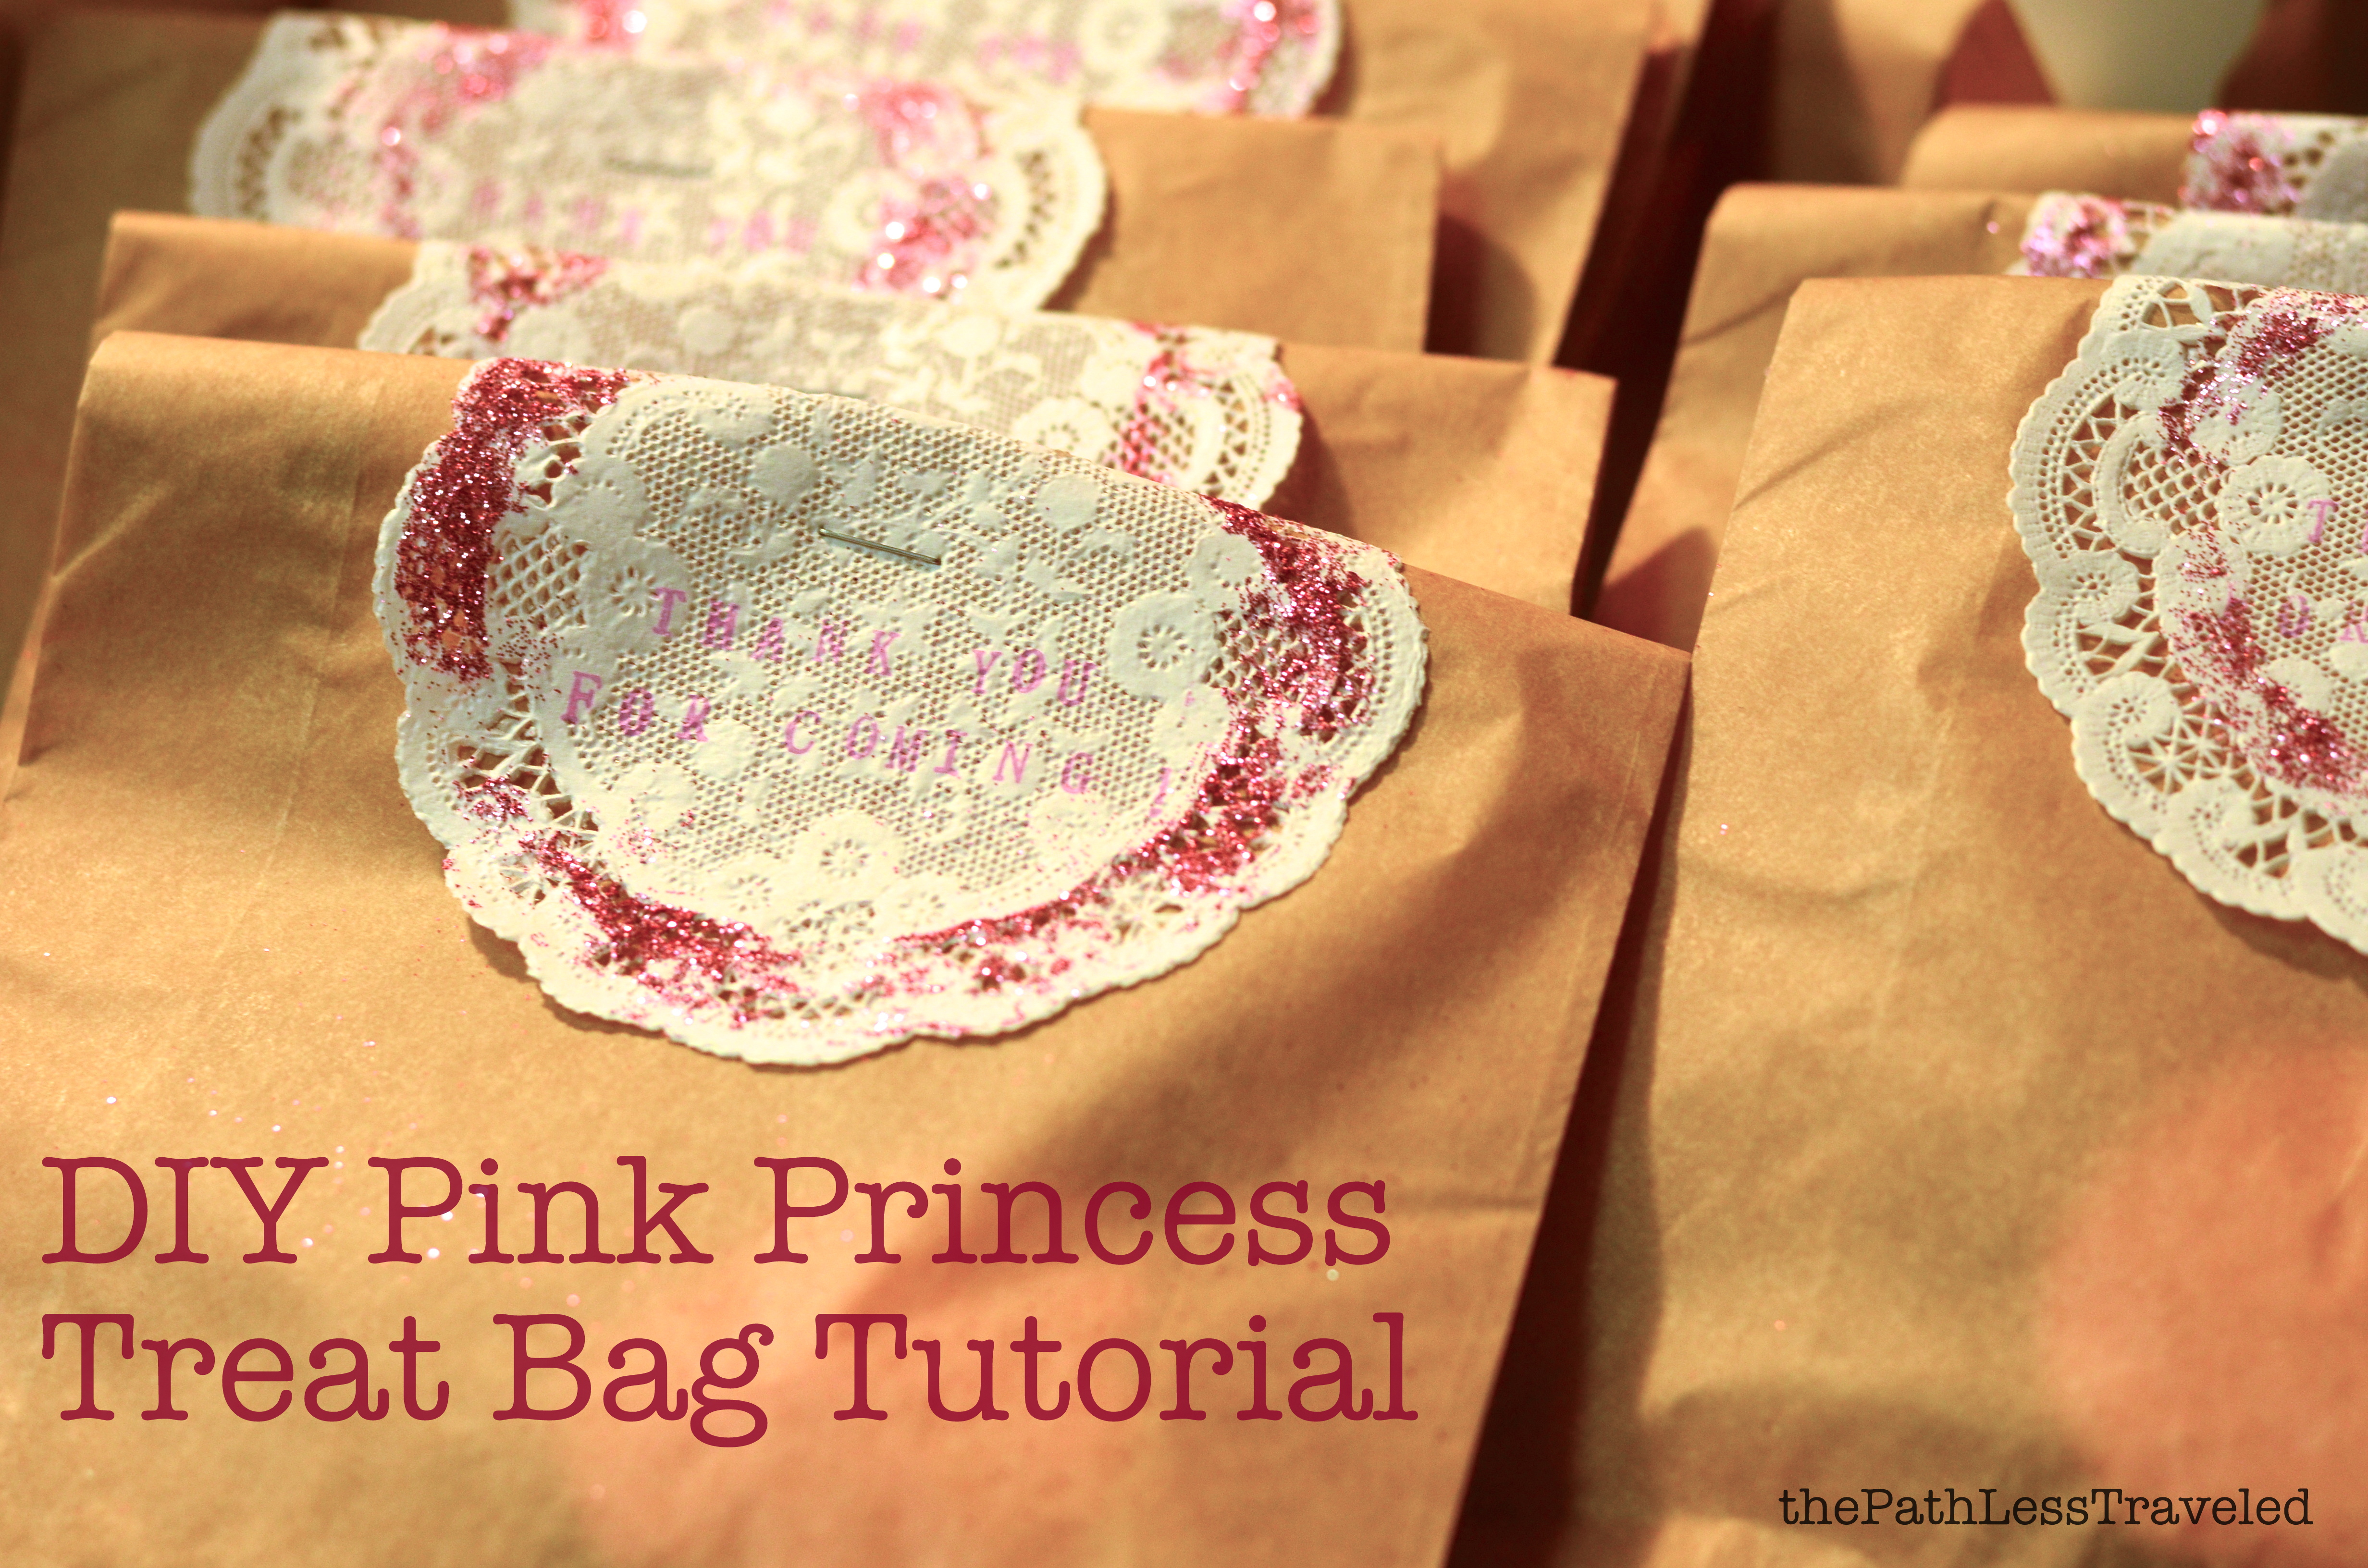
 to start with I used a pair of scallop scissors to even off and pretty up the ends of some brown sandwich bags.

the Path Less Traveled: Pink Princess Treat Bag Tutorial

then I used my multi-stamp that I use for all the hand-stamped things in the shop and some pink ink to stamp some 4-inch doilies with “thank you for coming!”

the Path Less Traveled: Pink Princess Treat Bag Tutorial

next, I used a glue stick on the edges of the doilies and sprinkled them with some bright pink glitter {so girly and princessey!}

DSC_0049

the last step was to pop the cookies into the bags, layer the doilies on them, fold over the tops and secure with a staple {I was hoping to punch holes and tie them with pink twine, but I was running behind … my sister-in-law ended up doing this step for me. Thanks so much Sarah!}.

DSC_0047

There you have it! Some sweet, simple, glittery and pink favor bags for a pink loving princesses birthday party :)

I’m really looking forward to showing you the rest of the details from her party! <3

How Tuesday: DIY Love Note Tree

How Tuesday: DIY Love Note Tree

So, perhaps you noticed that this How-Tuesday is on a Wednesday? Yes, it’s taken me a few days to get back up to speed after coming back from the wedding. But, even though it’s Wednesday and not Tuesday, I still wanted to post this for you {Valentine’s Day is coming! And you’ll want to start this as far ahead of the special day as possible, I imagine, so I didn’t want to wait until next week :)}.

DIY Love Tree Tags from the Path Less Traveled

Kind of inspired by Emily in this post, this is a “Love Note Tree” that, as each day goes by, will get another heart added with a little note telling your love what it is about them that you adore.

DIY Love Tree Tags from the Path Less Traveledmaterials needed: 14 paper hearts, hole punch, twine {or ribbon} and scissors, and a pen

DIY Love Tree Tags from the Path Less Traveledstep one: punch holes in your hearts

DIY Love Tree Tags from the Path Less Traveledstep two: write “I love:” on your hearts, filling in the things/reasons as you hang them on your “tree” {in my case, a branch}

DIY Love Tree Tags from the Path Less Traveledstep three: cut the twine in 4-6″ lengths, thread them through the hearts and tie DIY Love Tree Tags from the Path Less Traveledstep four: hang them on your “tree”

 So there you have it! By the time Valentine’s Day is here, this little branch will be full of hearts. <3 And each one will have another thing about John that I love, written on it for him to read.

Do you have any little projects that you’re doing for your love? Or, if you have kiddos, that you’re helping them to do? I’d love to hear about them!

<3


How-Tuesday #2 – heart tie tutorial

How-Tuesday #2 – heart tie tutorial

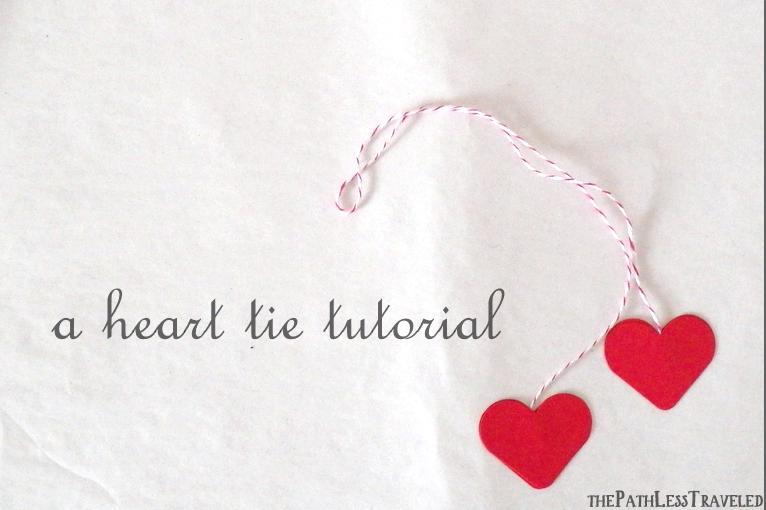
heart tie tutorial from the Path Less Traveled

Today’s How-Tuesday is super simple and so “love-ly” {sorry, couldn’t resist} and perfect for Valentine’s Day. Or, if you tweak it a bit, for any other occasion too, come to think of it … :)

It’s a sweet little way to finish off a gift, tie up a bag of sweets, add an extra touch to a Valentine – or even to use as a napkin ring – and I can’t figure out what to call it {“heart tie”? that would do, but kind of blah. But it’s the best my sleep-deprived-mama brain is coming up with at the moment!}. So, a sweet little heart tie tutorial, coming right up!

Materials needed:

materials for heart tie the Path Less Traveled

red hearts, red and white baker’s twine, and glue {I used basic white school glue for this tutorial, but I’ve found that glue sticks work just as well}

Instructions:

heart tie tutorial from the Path Less Traveled

 Step 1: cut a 12″ length of twine. Step 2: glue the hearts – a small dab on two and all around the edges on two.

Valentine bag with heart tie

Step 3: place the ends of the twine on the dabs of glue.

heart tie tutorial from the Path Less Traveled

Step 4: place the other glued hearts on top of the twine and press them together.

And that’s it! Pretty simple. :) And as I mentioned earlier, it can easily be tweaked for any occasion {stars instead of hearts, perhaps? Or little pumpkins?}, too.
If you want to dress it up a bit, just substitute ribbon for the twine!

<3